6 Best Interfacing Stabilizers For Hat Embroidery
Discover the 6 best interfacing stabilizers for hat embroidery to ensure crisp, professional results on every project. Read our expert guide and start stitching!
Embroidery on headwear bridges the gap between structured textile work and high-tension needle arts. A hat is rarely a flat canvas; it is a complex, curved surface that demands precise support to prevent puckering or distorted stitches. Without the correct interface, even the most intricate design will succumb to the movement of the fabric beneath the needle. Choosing the right stabilizer is the fundamental difference between a professional-looking project and one that loses its shape after the first wear.
Sulky Cut-Away Plus: Best for Knit Beanies


Knit beanies possess a natural elasticity that works against the rigid nature of embroidery. If a stabilizer is too flimsy, the stretchy fabric will pull away from the needle, causing gaps in the stitch density. Sulky Cut-Away Plus provides the necessary internal architecture to hold the knit loops in place while the machine works.
Because this stabilizer is permanent, it remains inside the beanie to support the embroidery through repeated washes and stretches. This is critical when working with high-twist wool or acrylic blends that have a tendency to “rebound” after being manipulated. The cut-away nature ensures that the fabric does not lose its structural integrity after the hoop is removed.
Always ensure the design has a proper underlay when using a cut-away stabilizer on knit fabrics. Too much density without that foundation can lead to a “heavy” look that stiffens the beanie uncomfortably. A medium-weight cut-away is generally the gold standard for most soft-structure headwear.
World Weidner Tear Away: Pro-Level Cap Backing
Tear-away stabilizers are the workhorse of high-volume embroidery shops, especially when speed and efficiency are prioritized. World Weidner Tear Away is specifically designed to provide high-tensile strength during the embroidery process and clean, easy removal afterward. It is ideal for structured baseball caps where the fabric has little to no natural stretch.
When using tear-away on a cap, the focus must be on horizontal stability. The stabilizer prevents the needle from pulling the fabric inward, which is the primary cause of the dreaded “puckering” along the embroidery perimeter. Because structured caps are stiffened by the manufacturing process, they don’t require the permanent support of a cut-away.
Be mindful that tear-away stabilizers can be fragile if the stitch count is exceptionally high. If a design requires heavy satin stitching or dense fills, consider double-layering the stabilizer to prevent it from tearing prematurely. When the project is finished, remove the backing by pulling it carefully toward the stitches to prevent distorting the finished work.
Sulky Sticky Fabri-Solvy: For Hard-to-Hoop Areas
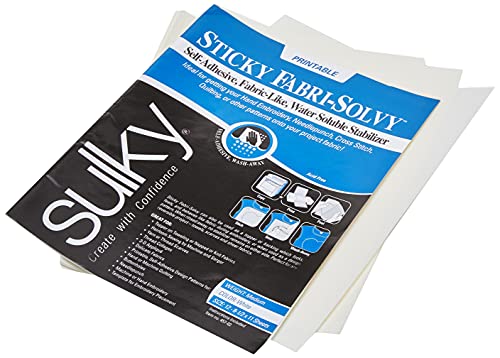
Some hat components are physically impossible to fit into a standard hoop due to their shape or size. Sulky Sticky Fabri-Solvy acts as a repositionable anchor, allowing fabric to be secured to the stabilizer itself rather than forcing the fabric into a frame. This is an essential technique for embroidering near the brim or on irregular, contoured panels.
This product is particularly useful for delicate fabrics that might be marred by the pressure of an inner and outer hoop ring. By utilizing the adhesive surface, the fabric remains flat and tension-free throughout the entire embroidery cycle. It effectively eliminates the risk of hoop burn on sensitive materials like velvet or fine synthetic felts.
Once the embroidery is complete, this stabilizer washes away completely in warm water. This leaves the interior of the hat soft and irritation-free, which is vital for garments worn directly against the skin. It is the best choice for intricate details where visibility and precision are the primary concerns.
Floriani No Show Mesh: The Invisible Solution
The “No Show” designation refers to the stabilizer’s ability to remain unnoticed through light-colored or thin-knit fabrics. Floriani No Show Mesh is a lightweight, translucent stabilizer that provides surprising strength without the bulk typically associated with other backings. It is the preferred choice for lightweight cotton or jersey-knit hats.
Most knitters struggle with “shadowing,” where a thick white stabilizer shows through the fabric of the hat, ruining the aesthetic. This mesh alternative prevents that issue entirely while still maintaining enough cross-grain stability to keep the needle path accurate. It is the perfect middle ground between a heavy cut-away and a flimsy tear-away.
Because it is a permanent mesh, it stays with the fabric to ensure the longevity of the embroidery design. It is essentially invisible to the wearer, providing a soft finish that doesn’t feel like a hard plastic barrier against the forehead. Use this when the goal is a seamless, professional look that doesn’t compromise the drape of the hat.
Pellon Peltex 71F: For Ultra-Stiff Hat Fronts

When dealing with structured trucker caps or reinforced panels, standard stabilizers often fail to provide enough rigid support. Pellon Peltex 71F is a sew-in or fusible stabilizer that acts more like an interfacing than a traditional embroidery backing. It creates a “shield” that prevents the machine from causing any fabric movement at all.
This is the nuclear option for dense, complex embroidery that covers a large surface area. By providing extreme stiffness, it prevents the thread tension from pulling the fabric into a concave shape. The result is a clean, crisp, and perfectly flat embroidery field that looks factory-made.
Keep in mind that using such a firm stabilizer will significantly increase the weight of the cap front. It is not suitable for lightweight or soft-fit beanies, as it will make the hat feel bulky and uncomfortable. Use it sparingly, only for those projects that require a high-end, commercial-grade structure.
Sulky Solvy Water Soluble: Topping for Fleece Hats

Stabilizers aren’t just for the back of the fabric; a “topping” is often necessary for textured materials. Sulky Solvy is a thin, clear film that sits on top of the fabric during the embroidery process. It is essential when working with fleece or high-pile yarn fabrics to keep the stitches from sinking into the fluff.
Without a topping, the stitches on a fuzzy hat will look buried or jagged, as the embroidery thread tries to navigate the uneven surface of the yarn. The topping forces the pile down, ensuring every stitch is visible and crisp. Once the machine finishes, the excess film is simply rinsed away or dabbed with a damp cloth.
Using a topping is not optional for textured knit or pile-based headwear; it is the difference between a blurry, unreadable design and a sharp graphic. It also acts as a lubricant for the needle, which can help prevent thread breaks when working with metallic or high-friction synthetic fibers.
How to Choose the Right Stabilizer for Your Hat
- Evaluate Fabric Stretch: If the material has more than 10% elasticity, choose a cut-away stabilizer to prevent the embroidery from buckling.
- Determine Structure: Rigid caps require tear-away; soft or formless hats require permanent cut-away or mesh.
- Assess Texture: Always pair a topping with any fabric that has a pile or “nap” to keep the design on the surface.
- Consider Wearability: If the embroidery will touch the forehead, choose a soft-touch product like a mesh or a water-soluble backing to ensure comfort.
- Check Design Density: Dense designs require heavy-weight stabilizers, while light monograms or thin lines can get away with a lighter backing.
Cut-Away vs. Tear-Away: Which One Do You Need?
The choice between cut-away and tear-away is dictated by the longevity and structure of the item. Cut-away is designed for items that undergo frequent mechanical stress, such as knits that must maintain their shape over years of use. It stays with the fabric, acting as a permanent skeleton for the stitches.
Tear-away is the choice for non-stretch items where the stabilizer is purely a convenience tool for the machine. It is removed to keep the garment lightweight and to ensure that the backing doesn’t interfere with the garment’s natural movement. If you choose the wrong one, the project will either stretch out of shape or fail to hold the stitch definition.
Always prioritize the fabric’s movement over the ease of removal. A tear-away on a stretchy beanie is a recipe for a distorted design, regardless of how much time it saves during the finishing process. Select the stabilizer based on how the hat is worn, not how it is made.
Pro Tips for Hooping and Stabilizing Curved Caps
Curved surfaces are the most difficult to stabilize because they naturally want to pull away from the machine’s presser foot. Always use a dedicated cap hoop if the project allows, as this mechanically compensates for the curvature. If hand-hooping is necessary, ensure the grain of the fabric is perfectly aligned with the stabilizer to minimize torque.
Never over-tighten the fabric in the hoop. While it seems counterintuitive, stretching the fabric while hooping it causes the hat to return to its original shape after the embroidery is done, which inevitably creates a puckered mess. The stabilizer should provide the tension, not the fabric itself.
Lastly, always pin or use spray adhesive to secure the fabric to the stabilizer in the hoop. This extra step prevents the subtle sliding that occurs during the high-speed motion of the embroidery head. Even a millimeter of movement can misalign a color change and ruin the entire cap.
Stabilizer Topping vs. Backing: What’s the Diff?
Backing supports the fabric from underneath to manage tension and maintain the stitch shape. Topping acts as a barrier from above, pressing down textured fibers so they do not protrude through the stitches. They are two distinct tools that rarely replace one another.
Backing is structural; topping is cosmetic. You can successfully embroider a smooth cotton cap with only a backing, but you can rarely embroider a fleece or cable-knit hat without a topping. Beginners often skip the topping, thinking it is an unnecessary expense, but it is the primary factor in achieving professional, clean edges on soft materials.
A simple rule of thumb: If the fabric feels smooth and dense, you likely only need a backing. If the fabric has any texture, fuzzy loops, or stretch, you should prepare to use both a backing and a topping. Think of the topping as a finishing agent that ensures the light hits your thread instead of the gaps in the fabric.
Selecting the correct stabilizer is as important as choosing the right needle or thread weight. By matching the structural needs of the hat fabric with the mechanical properties of the stabilizer, you ensure that the finished piece maintains its integrity and visual appeal. Take the time to assess the stretch, pile, and intended wear of the project before beginning your first stitch. With the right foundation, any cap can become a high-quality, professional piece of wearable art.