
6 Best Sewing Machine Buttonhole Feet For Garment Finishing
Upgrade your garment finishing with our top 6 sewing machine buttonhole feet. Discover the perfect tools for professional, clean results. Read our guide now.
A well-crafted buttonhole is the difference between a professional-looking cardigan and a garment that looks homemade. While knitting is the primary craft, sewing remains an essential skill for finishing edges, attaching buttons, and reinforcing plackets. Selecting the right buttonhole foot is vital for ensuring your buttons stay secure and your fabric remains pristine. This guide explores the best tools to help you bridge the gap between your finished knit and a functional, polished closure.
Janome Automatic Buttonhole Foot R: Best Overall
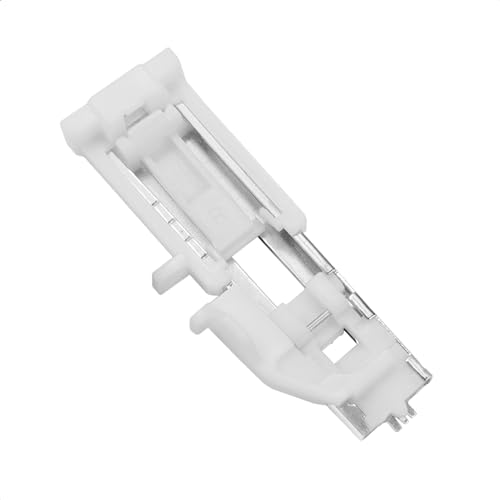

The Janome R foot functions with a sliding plate that measures the button size precisely before sewing begins. This eliminates guesswork, which is essential when you have spent hours knitting a delicate lace cardigan and cannot afford a mistake on the final placket.
The design relies on a clear measurement window that cradles the button, ensuring the machine knows exactly how long to make the buttonhole. It produces consistent, professional results regardless of the fabric weight or the density of your knit facing.
The primary tradeoff is that this foot requires a machine with a compatible electronic sensor system. If the machine does not recognize the foot, the automatic feature will not engage. For most users, the reliability of this foot makes it the gold standard for high-volume finishing.
Bernina Buttonhole Foot #3A: For Perfect Repeats

Precision is the hallmark of the Bernina #3A foot, which uses an optical sensor to track fabric movement. If you are sewing buttons on a set of identical sweaters for a family, this foot ensures every single buttonhole is an exact mirror of the last.
The foot allows for the manual adjustment of stitch density and width, which is crucial when working with varied knit stabilizers. When interfacing is thin, the machine can be adjusted to prevent the buttonhole from pulling or distorting the fabric edges.
Because it relies on advanced electronics, it is exclusive to Bernina’s higher-end computerized models. If uniformity across a production run is the goal, this sensor-based system is unmatched.
Singer 1-Step Buttonhole Foot: Best for Beginners
This foot simplifies the complex task of buttonhole creation into a single, seamless operation. It is an ideal companion for the beginner knitter who is just beginning to integrate sewing techniques into their repertoire and wants to avoid overly complex equipment.
The mechanism uses a dedicated slot that locks the button in place, while a lever on the machine side controls the reverse function. It provides a tactile, reliable process that feels intuitive rather than mechanical.
While it lacks the hyper-precision of expensive sensor feet, it is incredibly durable and forgiving. For those just starting their journey into garment construction, this foot offers the best balance of simplicity and effective performance.
Brother SA210 Buttonhole Foot: Most Versatile

The Brother SA210 is designed for makers who switch between different fabric weights, from light cotton facings to heavier wool-blend stabilization. Its wide opening accommodates a variety of stitch patterns, providing space for the needle to form tight, secure zig-zag bars.
The versatility of this foot lies in its ability to work with a range of Brother computerized machines. It balances the need for automatic sizing with a robust physical build that handles thicker materials without skipping stitches.
Be aware that because it is a general-purpose tool, it may require minor test runs on scrap fabric before committing to the actual garment. Choose this foot if the goal is a reliable workhorse that handles diverse projects with minimal setup changes.
Viking Sensor Buttonhole Foot: High-Tech Choice
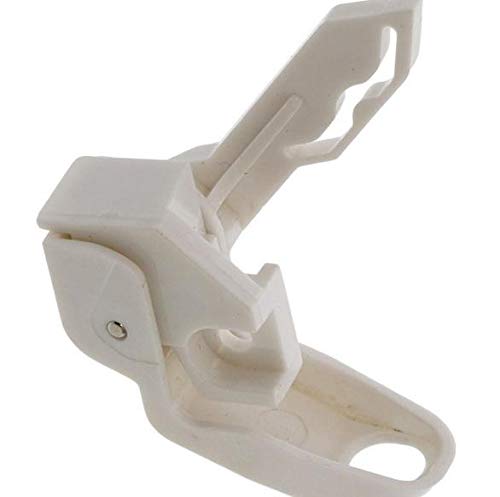
This foot utilizes a sophisticated sensor system to measure the fabric thickness and button diameter simultaneously. It is designed for the knitter who demands absolute perfection, especially when working with high-end, expensive yarns where the placket must be perfect the first time.
The foot is engineered to prevent the “fabric bunching” that often occurs when stitching onto stretchy knitted materials. By compensating for the density of the knit, it ensures the buttonhole remains flat and crisp.
As a high-tech option, it requires specific machine compatibility and a slightly steeper learning curve to master the settings. It is the top choice for those who view sewing as an extension of their high-precision knitting craft.
Juki 4-Step Buttonhole Foot: For Full Control
Unlike automatic feet, the Juki 4-step foot requires the user to manually move the machine dial at the end of each side of the buttonhole. While this sounds like a drawback, it provides total control for the knitter who wants to customize the length of every individual hole.
This is particularly useful when knitting buttons that vary slightly in shape, such as hand-carved wood or unique vintage toggles. It allows for the incremental adjustments that automatic machines often struggle to process.
There is a significant learning curve here, as the user must develop a rhythm for turning the dial. Use this tool if the projects involve unconventional buttons or if personal, manual oversight of every stitch is preferred.
One-Step vs. Four-Step: Which Is Right For You?
The one-step method is an automated, high-speed solution designed for efficiency and consistency. It is perfect for standard shirt-weight fabrics where the button size is uniform and the work is repetitive.
The four-step method offers manual override, allowing the operator to adjust the stitch width or length mid-process. This is superior when dealing with bulky, hand-knit edges that may require a wider stitch to encase the yarn properly.
- Choose One-Step if: Time is a factor and the project uses standard buttons.
- Choose Four-Step if: The buttons are irregular or the placket is unusually thick or stretchy.
Matching Your Foot to Your Sewing Machine Brand
Sewing machine feet are rarely universal, and attempting to force a foot from one brand onto another can damage the needle plate or the presser bar. Most major manufacturers use proprietary snap-on systems or specific shank heights that prevent cross-compatibility.
Always consult the machine manual to identify the shank type—typically low, high, or slanted. Purchasing a genuine brand-name foot ensures that the sensor points and the needle entry hole align exactly with the machine’s software.
Avoid “universal” knock-off feet; they often lack the precise engineering required to handle the tension changes needed for a clean, non-puckered buttonhole.
How to Get a Perfect Buttonhole Every Single Time
Success begins with stabilizing the fabric, especially when working with knit garments. Even with a high-end foot, stitching directly onto a loose knit will result in a distorted hole; always use a strip of lightweight, fusible interfacing on the backside of the placket.
Test the buttonhole on a scrap piece of fabric that matches the thickness and stretch of the actual garment. This allows for adjustments in the stitch density, ensuring the “bites” of the thread are close enough to hold the yarn fibers securely without shredding them.
Finally, use a sharp, new needle appropriate for the fabric weight, such as a ballpoint or stretch needle for knits. A dull needle will pull at the yarn and ruin the structural integrity of the buttonhole edge.
Troubleshooting Common Sewing Buttonhole Problems
If the machine stalls or refuses to move, check that the buttonhole lever on the machine is fully lowered. This is the most common user error and is often overlooked by beginners and seasoned sewists alike.
Should the buttonhole look uneven or puckered, the tension might be too tight for the weight of the knit. Lowering the top thread tension slightly often allows the bobbin thread to pull the stitches flatter, creating a cleaner finish.
Lastly, if the stitches appear thin or gappy, ensure the stitch width is set wide enough to overlap the fabric edges effectively. If the buttonhole still looks poor, re-check the stabilizer; 90% of all buttonhole issues are actually problems with the fabric foundation, not the foot itself.
Mastering the buttonhole foot is a rewarding step in elevating knitwear from a hobbyist’s project to a professional-grade garment. By understanding the mechanical differences between automatic, semi-automatic, and manual feet, the knitter can choose the tool that best aligns with their specific aesthetic and functional goals. Remember that the secret to a perfect closure lies as much in the preparation of the knit fabric as it does in the precision of the sewing machine. Invest in the right tool, prioritize stabilization, and the result will be a secure, beautiful finish that lasts for years.