6 Best Ornament Caps For Replacing Broken Vintage Hardware
Restore your antique decorations easily. Discover the 6 best ornament caps for replacing broken vintage hardware and keep your holiday heirlooms looking perfect.
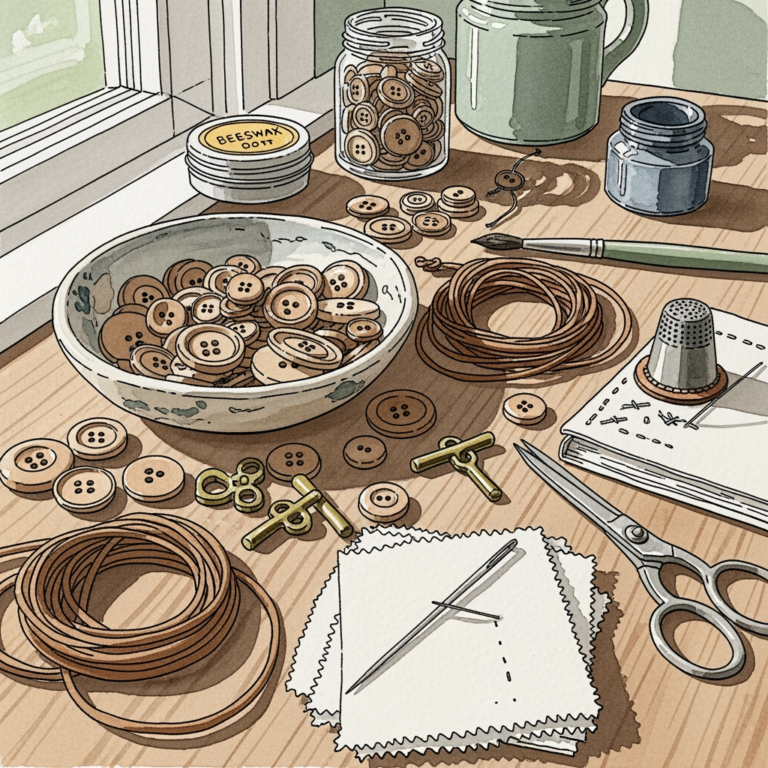
Vintage glass ornaments often hold the same sentimental weight as a hand-knitted heirloom blanket passed down through generations. Much like a perfectly blocked lace shawl, an ornament’s longevity depends entirely on the integrity of its structural components. When a brittle, rusted cap fails, the piece is at risk of shattering, turning a cherished memory into a pile of shards. Finding the correct hardware replacement is the best way to ensure these delicate treasures survive for decades to come.
Darice Metal Caps: Best Classic Replacement

These caps offer the most straightforward aesthetic, mimicking the standard silver or gold closures found on mid-century glass baubles. They provide a clean, unobtrusive finish that allows the ornament’s own texture or color to remain the primary focal point.
- Standard fit: Excellent for mass-market vintage ornaments.
- Material: Lightweight, thin-gauge metal.
- Durability: Moderate; best for smaller, lighter glass pieces.
Choosing a Darice cap is similar to selecting a standard nickel-plated needle for a basic stockinette project; it is reliable, predictable, and functional. If the ornament is particularly heavy or the glass neck is slightly uneven, however, this lightweight metal might flex under tension. Use these when authenticity of appearance matters more than heavy-duty reinforcement.
Ornate Filigree Toppers: Most Decorative Option
Filigree caps introduce a layer of Victorian-inspired elegance, turning a simple glass orb into a centerpiece. These toppers often feature intricate, lace-like metalwork that echoes the sophistication of a complex cabling pattern or a delicate stranded colorwork motif.
- Visual impact: High decorative value.
- Weight: Heavier than standard caps, which requires a sturdy ornament neck.
- Versatility: Ideal for solid-colored or mercury glass ornaments.
While these caps are undeniably beautiful, they require a bit more finesse during installation to ensure the delicate “petals” of the filigree do not snag or tear the ornament’s fragile rim. They are perfect for ornaments that lean into a traditional, ornate holiday aesthetic. Always confirm the diameter of the cap against the neck size, as these rigid structures do not offer the same “give” as thinner metal options.
Solid Brass Caps: The Premium Heritage Choice
When preserving a truly rare or antique piece, brass is the gold standard for long-term stability. Much like choosing a high-quality, long-staple wool over a synthetic blend for a garment, brass provides superior resistance to oxidation and structural fatigue.
- Longevity: Exceptional; brass does not rust like base-metal alternatives.
- Weight: Provides a subtle, premium heft that balances the ornament.
- Finish: Develops a rich patina over time, which often matches the aged look of antique glass.
If the ornament is a heavy, hand-blown piece, a solid brass cap offers the structural integrity needed to prevent accidental drops. These are the preferred choice for collectors who view their ornaments as long-term investments. Expect a higher price point, but consider it an investment in the piece’s permanent storage integrity.
Spring-Wire Caps: Best for Odd-Sized Necks
Vintage manufacturing standards were rarely uniform, leaving many collectors with ornaments that fall between standard sizes. Spring-wire caps function similarly to a circular needle cable, providing the necessary tension to secure a cap to a neck that is slightly too wide or narrow for a fixed-size closure.
- Adjustability: High; the tension of the wire holds the cap in place without needing precise measurement.
- Mechanism: Uses internal tension to grip the interior of the glass neck.
- Security: Very reliable for irregular or handmade glass rims.
Using these is a practical solution for “difficult” pieces that otherwise refuse to accept a standard cap. They eliminate the guesswork involved in finding the exact millimeter diameter of a hand-blown neck. While they may lack the decorative finish of a filigree topper, their functional superiority for non-standard sizing is unmatched.
ArtMinds Assorted Caps: Best Value Bulk Pack
When restoring an entire collection or a large set of inherited ornaments, purchasing single replacements becomes inefficient and costly. Assorted packs provide a spectrum of sizes and finishes, allowing for quick pairing without waiting for individual shipments.
- Convenience: Contains multiple sizes for varied inventory.
- Cost-effectiveness: Best for those with high-volume restoration needs.
- Trade-off: Some pieces in bulk packs may be of lower metallurgical quality than specialty replacements.
Think of these packs as the “utility yarn” in your stash—perfect for the bulk of the work, even if you keep higher-end materials for the “showstoppers.” They are excellent for everyday vintage pieces that are part of a larger, unified collection. Just be aware that the metal may be thinner, so exercise caution when applying tension to the prongs.
Antique Bronze Caps: Best for a Vintage Look

If the goal is to seamlessly blend a new cap with an aged ornament, the antique bronze finish is the most effective choice. These caps are manufactured with a darkened, weathered patina that prevents the jarring appearance of shiny, “brand new” hardware against an old glass surface.
- Aesthetic integration: Perfect for oxidized or dark-toned vintage glass.
- Atmosphere: Adds a sophisticated, “found object” quality to the display.
- Matching: Complements deeper, warmer color palettes in holiday decor.
Using a bright silver cap on a dark, aged bauble can make the repair look amateur, much like using a stark white, high-contrast yarn for a repair on a faded vintage sweater. Antique bronze provides a professional, “invisible” finish that respects the age of the item. It is the sophisticated choice for those who value historical cohesion in their decor.
How to Match a Cap to Your Vintage Ornament
Matching a cap is essentially an exercise in balancing weight and diameter. Just as you must match the weight of your yarn to the gauge of your needles to avoid a fabric that is too stiff or too holey, you must match the cap to the ornament’s physical properties.
- Assess weight: Heavy glass needs a cap with stronger, more rigid prongs.
- Analyze color: Match the finish to the existing patina of the ornament’s remaining components.
- Check style: Choose between ornate or minimalist to maintain the visual balance of the piece.
Avoid the mistake of forcing a rigid cap onto a fragile neck, as glass can stress-fracture under pressure. If the ornament is extremely lightweight, opt for a thinner, more flexible metal that won’t compromise the rim. Prioritize fit above all else; if the cap moves, the ornament is in danger.
Measuring Your Ornament Neck for a Perfect Fit
Precision is critical when dealing with antique glass. Use digital calipers to measure the exterior diameter of the neck, as these provide a much more accurate reading than a standard ruler.
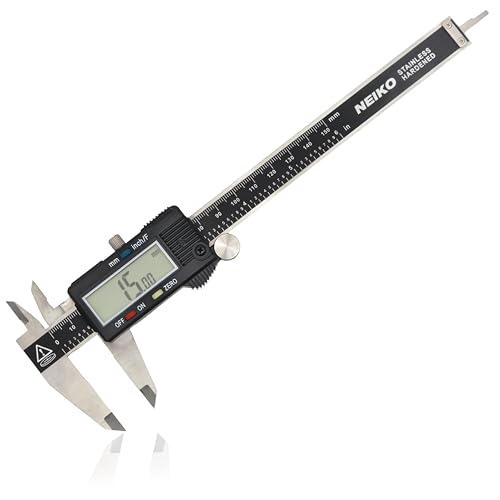
- Measure twice: Check both the neck and the widest point of the rim.
- Accounting for variation: If the neck is tapered, ensure the cap prongs will lock under the rim safely.
- Don’t rely on averages: Each piece is an individual; do not assume all ornaments from the same set share identical measurements.
Think of this like taking your gauge swatch before starting a sweater; skipping this step leads to frustration and potential project failure. If the measurement falls between sizes, always choose the slightly larger cap and adjust the prongs inward. It is far easier to tighten a cap than it is to stretch one.
How to Safely Attach Your New Ornament Cap
Installing a cap requires a steady hand and a gentle approach, much like grafting stitches in a delicate lace project. Ensure the prongs are fully inserted into the ornament’s neck before attempting to fold them down.
- Position: Center the cap over the neck opening.
- Seat: Press down firmly but evenly so the cap sits flush against the rim.
- Secure: Use needle-nose pliers with a protective cloth over the tips to bend the prongs inward.
- Verify: Gently tug the cap to ensure the prongs are locked securely under the rim.
Always work over a soft surface, such as a thick towel or foam mat, to prevent the ornament from breaking if it slips. If the glass rim looks chipped or compromised, proceed with extreme caution. The goal is to provide stability, not to force the metal into a shape that puts stress on the glass.
Do You Need Glue? Securing Your Ornament Cap
Most vintage ornament caps are designed to be friction-fit, meaning they hold themselves in place through tension. Adding glue is often an unnecessary complication that can cause more harm than good, especially if it reacts poorly with aged paint or glass.
- Avoid: Super glues, which can cause permanent damage or discoloration to vintage finishes.
- Consider: A tiny dot of acid-free, archival adhesive if the cap is loose and the ornament is exceptionally heavy.
- Recommendation: Rely on the physical tension of the metal prongs whenever possible.
Treat glue as a last resort, similar to using a stay-stitch or reinforcement only when a project’s structural integrity is truly at risk. If you find yourself needing excessive glue, the cap likely does not fit the neck properly. Re-evaluate the sizing or the prong tension before applying any permanent adhesives.
Restoring the hardware on vintage ornaments is a rewarding way to extend the life of cherished family traditions. By choosing the right cap for the specific needs of your glass, you ensure that these delicate pieces remain intact for many seasons of enjoyment. Take the time to measure correctly and handle the glass with care, and your ornaments will continue to shine brightly on your holiday displays.