
6 Best Rivets For Reinforced Bag Handles To Use
Strengthen your craft with our expert guide to the 6 best rivets for reinforced bag handles. Read our top picks and secure your projects with confidence today.
Handmade bags deserve hardware that matches the integrity of the stitches used to create them. A beautiful, cable-knit tote or a sturdy felted project bag is only as reliable as the points where the handles connect. Choosing the right rivet ensures that those handles remain secure, even when the bag is filled with heavy wool, needles, and notions. These six options represent the gold standard for crafters looking to bridge the gap between textile arts and professional bag making.
Tandy Leather Double Cap Rivets: Best All-Rounder

Tandy Leather Double Cap rivets are the reliable workhorse of the leather and craft world. They offer a clean, professional finish on both sides of the handle, which is essential if the back of the attachment point remains visible inside the bag.
These rivets are perfect for medium-weight leather or reinforced webbing handles. Because the caps are identical, they provide a symmetrical, polished look that elevates the appearance of any handmade project.
The primary trade-off is the need for a specific setter tool and a solid surface to avoid marring the finish. For those accustomed to the precision of blocking a delicate lace shawl, this requirement for tool-based accuracy will feel familiar and manageable.
Kam Snaps Chicago Screws: Easiest to Install
Chicago screws serve as a semi-permanent solution for handle attachment. Unlike traditional rivets that require a hammer and setter, these screw together, making them ideal for knitters who want a modular design.
If the fabric of the bag handles wears out or if the bag needs to be disassembled for heavy-duty washing, these screws can be removed with a simple screwdriver. This flexibility is a significant advantage over permanent hardware.
However, keep a drop of thread locker or clear nail polish on the threads during final assembly. Vibration during regular use can cause them to loosen over time, much like a stitch marker might slip off a needle if not properly secured.
Dritz Home 2-Part Rivets: Widely Available Pick
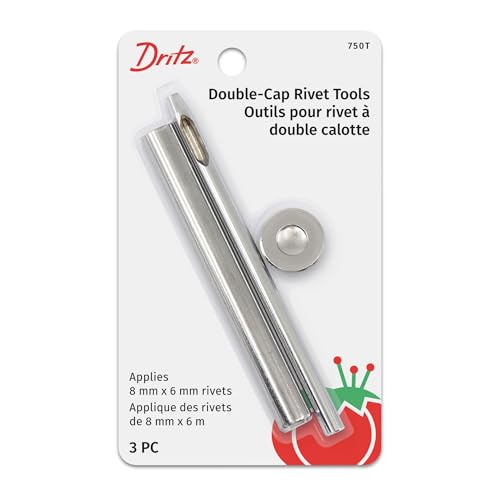
Dritz Home 2-Part rivets are the most accessible choice, frequently found in local sewing and craft stores alongside knitting needles and notions. They function well for general-purpose repairs and lightweight bag projects.
These rivets provide a functional connection without requiring a deep dive into specialty leatherworking supplies. They are best suited for smaller bags, such as project pouches or clutch-style knit carriers.
Because these are mass-market items, the metal can occasionally feel lighter than boutique alternatives. Avoid using them on heavy, leather-strapped totes intended to carry multiple pounds of yarn, as the shank length may not provide sufficient grip for dense, multi-layer fabrics.
Emmaline Bags Rivets: Boutique Quality Choice
Emmaline Bags specializes in hardware specifically engineered for professional-looking bag construction. Their rivets feature a slightly longer shank, which is a massive benefit when attaching handles to thick wool, batting, or internal stabilizers.
The plating quality on these rivets is superior, meaning the finish won’t flake or tarnish after just a few months of regular use. When the effort of knitting a complex bag body is involved, using hardware that matches that longevity is a sound investment.
These rivets are designed for the “bag-making knitter” who values aesthetics as much as utility. They offer a high-end look that ensures the final product resembles a luxury item rather than a homemade craft.
Ohio Travel Bag Jiffy Rivets: Heavy-Duty Option
Ohio Travel Bag is a staple in the professional leathercraft industry, and their Jiffy rivets are built for strength. These are designed to withstand high-tension environments, making them the superior choice for heavy, over-the-shoulder straps.
Setting these requires a firm hand and a steel anvil, but the result is a near-indestructible handle attachment. If the project involves thick felt or multiple layers of heavy-gauge canvas, these rivets will penetrate and secure the layers with ease.
The trade-off is their utilitarian aesthetic. They provide a rugged, industrial look that complements rustic, earthy fibers like wool and alpaca, rather than the sleek, minimalist look of lighter jewelry-grade hardware.
Sallie Tomato Tubular Rivets: For Thick Layers
Sallie Tomato tubular rivets are unique because the shaft is hollow, which allows for a cleaner fold during the setting process. This design is particularly effective when working with thick, squishy layers of fabric or dense, felted wool.
Because they require less force to set than solid-shank rivets, they are less likely to deform the surrounding fabric. This preserves the texture of the knitting or the integrity of the weave, ensuring that the attachment point doesn’t create unsightly puckering.
They provide a soft, rounded appearance that works well with soft-body bags. When choosing between these and standard solid rivets, prioritize tubular options if the handle material feels prone to compressing or crushing under a hammer.
How to Choose the Right Rivet Size for Your Bag
The length of the rivet post is the most critical measurement, as it must reach through all layers of the bag and handle with a small amount of space remaining for the cap. If the post is too short, the rivet will fail; if it is too long, the handle will feel loose and wiggle.
Measure the thickness of the fabric, stabilizer, and handle together while they are compressed, not loose. A good rule of thumb is to add 2mm to the total thickness to allow for the metal to mushroom correctly during the setting process.
- Thin Fabric: 4mm–6mm post.
- Medium Webbing/Leather: 7mm–9mm post.
- Heavy Felt/Multiple Layers: 10mm+ post.
Essential Tools for Setting Rivets Like a Pro
The quality of the rivet set is determined by the tool used to strike it. A standard household hammer is often too heavy and imprecise, which can result in flattened, crooked, or scratched rivet heads.
Invest in a dedicated riveting setter kit that matches the diameter of the rivets being used. A poly-mallet is also essential, as it provides enough force to set the metal without the harsh, ringing impact of a steel-on-steel strike.
- Setting Base (Anvil): A steel plate or concave block to support the rivet head.
- Hole Punch: A rotary punch or drive punch to create clean, non-fraying holes.
- Setting Tool: A concave punch that shapes the rivet cap while protecting the finish.
Single Cap vs. Double Cap Rivets: What’s Best?
Single cap rivets feature a cap on one side and an open, hollow end on the other. They are significantly easier to set because the post is thicker and less prone to bending, but they look unfinished on the inside of the bag.
Double cap rivets are aesthetically superior, displaying a polished dome on both sides. While they are slightly more difficult to install—requiring perfect alignment to avoid denting the cap—the professional look is almost always worth the extra effort.
For decorative handles where the reverse side will be visible, always choose double cap. If the rivet is going through a lining where it will be hidden by a pocket or hidden seam, a single cap is a perfectly acceptable, time-saving choice.
Installing Rivets in Knit Fabric: A Quick Guide
Setting hardware directly into knit fabric is risky because the weave can shift or unravel, causing the rivet to pull through the material. Always reinforce the area with a small piece of fusible interfacing, stiff leather, or heavy-duty webbing before punching the hole.
Use a fray-check or a tiny dab of fabric glue on the hole edges after punching to stabilize the yarn. Treat the hole as if it were a buttonhole; the metal hardware needs a stable “anchor” to prevent the live stitches from distorting under the weight of the bag’s contents.
Finally, consider placing a small washer or a piece of plastic canvas between the rivet and the knit fabric on the inside. This provides a wider surface area for the rivet to grip, effectively preventing the metal from pinching or cutting through your delicate fiber work.
Choosing the right rivet is the final, vital step in ensuring your knit or crochet project evolves into a durable, functional accessory. By matching the strength of the hardware to the density of your material, you ensure that your hard work survives years of daily use.