6 Best Cable Stitch Instructions For Beginner Knitters
Master the art of cabling with these 6 beginner-friendly patterns. Learn essential techniques to add beautiful texture and depth to your next knitting project.
Cables are the secret language of knitters, transforming simple loops of yarn into sophisticated, structural masterpieces that look far more difficult than they actually are. While the crisscrossing stitches might seem daunting, they rely on a single, fundamental mechanic of moving stitches to a separate needle and holding them in place. Once you master this simple shift, you unlock a world of texture that adds warmth and heirloom quality to any garment. This guide will walk you through the essential techniques to build your confidence and refine your cable-knitting skills.
Mastering the Basic Four-Stitch Right Cross Cable
The four-stitch right cross is the "Hello World" of the cabling universe. It involves splitting four stitches into two groups and swapping their positions so the right-hand pair crosses over the left-hand pair.
To execute this, slip the first two stitches onto your cable needle and hold them to the back of your work. Knit the next two stitches from your left-hand needle, then knit the two stitches from your cable needle.
This creates a subtle, elegant twist that leans toward the right. It is the perfect starting point because the small stitch count prevents the yarn from becoming overly stretched or distorted.
How to Execute the Classic Left-Leaning Cable
Left-leaning cables are the mirror image of the right cross, providing symmetry to your patterns. The key difference here is where you hold your cable needle: you must hold it to the front of your work.
Slip two stitches onto your cable needle and let it hang in front of your knitting. Knit the next two stitches from the left-hand needle, then return to the cable needle to knit those held stitches.
Because the cable needle is held in front, the stitches naturally pull to the left. Beginners often find this slightly more awkward than the right cross, so take your time to ensure your yarn isn’t pulled too tightly between the cable needle and the main work.
Step-by-Step Guide for the Simple Six-Stitch Rope
The six-stitch rope is where your cables begin to look like substantial, traditional knitwear. By increasing the number of stitches involved, you create a more pronounced, rope-like texture that catches the light beautifully.
You will split these six stitches into two groups of three. Following the same logic as the four-stitch cable, you hold three stitches to the back, knit three, then knit the held stitches.
The "rope" effect comes from repeating this cross every six to eight rows. Consistency in your row count is vital here; if you lose track, the rope will appear uneven or "stutter" in its twist.
Working the Elegant Honeycomb Cable for Beginners
Honeycomb cables are visually striking, appearing as a series of interlocking hexagons. While they look complex, they are simply a series of alternating left and right crosses that move across the fabric.
You will work a series of right-leaning crosses, followed by a series of left-leaning crosses on subsequent rows. The secret is keeping track of your "path" so the stitches travel in the correct direction to form the hexagon shape.
I recommend using a stitch marker to denote the start of your cable repeat. Because this pattern requires more attention, it is best to work it in a smooth, high-twist wool that clearly defines the stitch definition.
Techniques for the Braided Cable Stitch Pattern
Braids are the showstoppers of the knitting world, often seen on thick, cozy fisherman sweaters. They involve three separate sections of stitches that are crossed over one another in a specific sequence.
You aren’t just moving one set of stitches; you are juggling two sets of held stitches. It requires patience and a bit of practice to keep the tension even across all three "strands" of the braid.
If you are just starting, choose a yarn with good "memory"—like a bouncy Highland wool. Avoid slippery fibers like silk or bamboo for your first braid, as the stitches are more likely to pop off the cable needle while you are maneuvering.
Creating Texture With the Basic Plait Cable Stitch
The plait cable is a flatter, wider version of the braid that lays beautifully against the chest of a sweater. It creates a dense, warm fabric that is incredibly durable.
To create a plait, you will often work with four or more stitches per section. The crossing sequence is slightly slower than a standard braid, which allows the fabric to maintain a more consistent gauge.
Pay close attention to your "purl" stitches between the cables. These background stitches act as a frame; if your purls are too loose, the cable will look sunken, but if they are too tight, the fabric will pucker.
Essential Tools Needed for Perfect Cable Knitting
You don’t need a fancy kit, but the right cable needle makes a world of difference. I prefer wooden or bamboo cable needles because they have a slight "grip" that prevents stitches from sliding off unexpectedly.
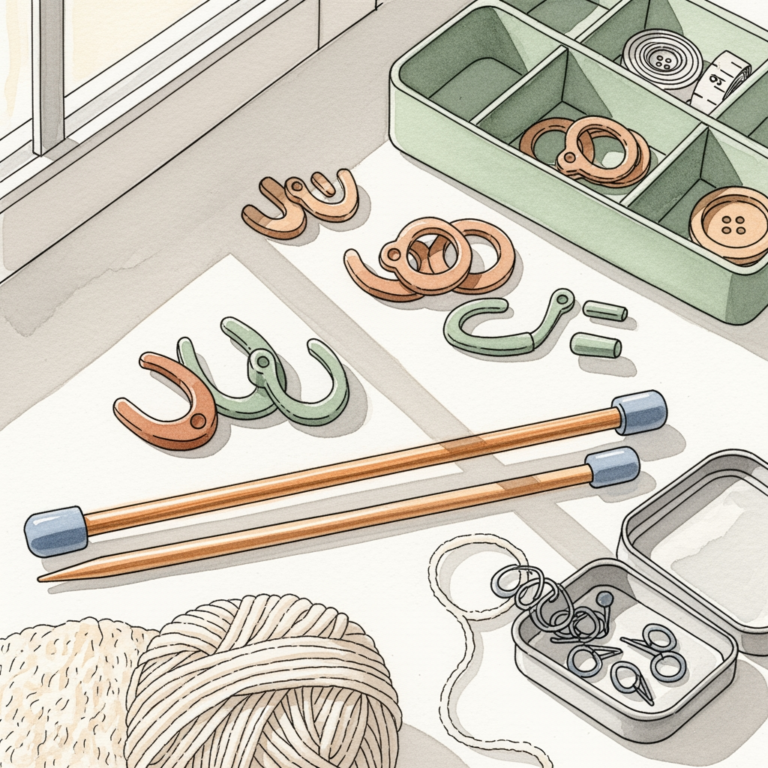
A J-shaped or "hooked" cable needle is excellent for beginners because the crook holds the stitches securely in the dip. Avoid metal cable needles until you are comfortable with the technique, as they can be quite slippery.
Keep a handful of locking stitch markers nearby to track your rows. When you are cabling, knowing exactly which row you are on is the difference between a perfect project and a frustrating trip to the "frog pond" (where you have to rip it all out).
How to Read Cable Charts in Your Knitting Patterns
Cable charts are visual maps that represent your knitting as if you were looking at the right side of the fabric. Each square represents a stitch, and symbols within the squares indicate the direction of the cable.
Look for the "key" at the beginning of your pattern, which explains what each symbol means. A slash leaning to the right signifies a right-leaning cable, while a slash to the left signifies a left-leaning one.
Always work your way from the bottom up, reading right-side rows from right to left and wrong-side rows from left to right. If you get lost, look at your actual knitting; the physical twist of the cable will tell you exactly where you are in the sequence.
Troubleshooting Common Mistakes in Cable Knitting
The most common issue is the "gap" that appears at the base of a cable. This is usually caused by pulling the yarn too tightly when you transition from the cable needle back to the main needle.
To fix this, try to keep your tension consistent as you knit the held stitches. If the gap persists, don’t worry; a good wet-block (soaking your finished piece and pinning it to shape) will usually close those small holes right up.
If you find you’ve crossed your cable in the wrong direction, don’t panic. You can "drop" the cable stitches down to the row where the mistake occurred and re-knit them correctly using a crochet hook, saving you from ripping back the entire project.
Tips for Maintaining Tension in Cable Projects
Cables naturally pull the fabric inward, making it denser and narrower than standard stockinette. Because of this, you may need to go up a needle size if you are cabling across a large portion of your project to prevent the fabric from becoming too stiff.
Avoid "death-gripping" your needles. If you hold your yarn too tightly while moving stitches to the cable needle, you will create uneven tension that is very difficult to fix later.
Focus on the rhythm of your movements. Cabling is a tactile, rhythmic process; once you settle into the pattern of "slip, hold, knit, knit," your hands will naturally find the correct tension for your specific yarn and style.
Cabling is a skill that rewards patience and practice, turning simple yarn into intricate, three-dimensional art. As you work through these six stitches, remember that every master knitter started exactly where you are, likely with a dropped stitch or two along the way. Trust the process, keep your cable needle handy, and enjoy the satisfying shift as your stitches twist into place. With these foundations, you are well on your way to creating timeless, textured garments that will last a lifetime.