6 Best Leather Scrap Bags For Practicing Techniques
Master leatherworking with our 6 best leather scrap bags. Choose your perfect pack today to start practicing professional crafting techniques with quality hides.
Mastering leatherwork is much like transitioning from basic garter stitch to complex cables; the materials used during the learning phase dictate how quickly skills improve. Just as choosing the wrong yarn weight can ruin a carefully planned sweater, selecting inappropriate leather scraps can discourage even the most patient maker. High-quality remnants provide the perfect low-stakes environment for refining edge finishing, stitching, and hardware installation. This guide highlights the best leather scrap bags to help build expertise without the cost of full-hide projects.


Tandy Leather Crafting Scraps: Best Overall
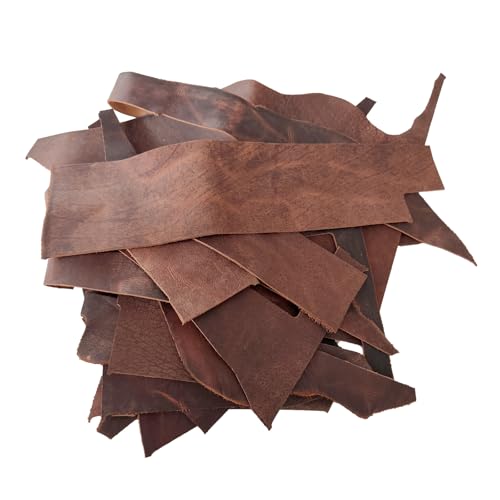
Tandy Leather holds a foundational position in the industry, making their scrap bags a reliable starting point. These bags typically contain a mix of vegetable-tanned leather, which is ideal for those learning to mold, stamp, and burnish edges.
Consistency is the primary advantage here. If you are learning to set rivets or install snaps, having a uniform, predictable temper is essential.
Expect a variety of weights, ranging from thin garment-grade pieces to sturdier project leathers. Treat these like a stash of versatile worsted-weight wool; they are suitable for almost any entry-level task.
S-DEAL 5 lb Leather Remnants: Best Bulk Value

When the goal is sheer volume for repetitive drills—like practicing the perfect saddle stitch or decorative lacing—bulk is necessary. S-DEAL provides a heavy-duty option that removes the anxiety of “wasting” expensive material while troubleshooting your technique.
This package is best utilized for making prototypes or test-swatches. Think of this as the “practice acrylic” of the leather world; it is meant to be pushed, pulled, and pierced until the muscle memory is firmly established.
Be aware that bulk bags can be inconsistent in thickness and grain texture. Use these for internal structures, practice seams, or small items like cord keepers rather than finished, high-end accessories.
Sepici Upholstery Leather Scraps: Best Finish
Upholstery leather is treated and finished in ways that traditional tooling leather is not. These scraps are often softer, more pliable, and possess a consistent, professional-grade surface texture.
This type of leather is perfect for practicing decorative top-stitching or working with machines. If the focus is on creating delicate goods, such as small pouches or linings for knitted bags, the supple nature of these remnants mimics high-end finished materials.
Because this leather is already processed, it does not take dyes or tooling stamps well. Reserve this material for mastering construction assembly and clean finish work.
Frog Jelly Mixed Color Scraps: Most Versatile
Variety is the spice of craft, and for those interested in color blocking or mixed-media accessories, these scraps provide an excellent color palette. Working with different colors helps identify how various tanning processes affect the needle’s entry and the strength of the bond.
The pieces in these sets are often smaller, making them suitable for embellishments, labels, or intricate applique. This is the equivalent of a scrap-booking approach to leatherwork, where the goal is to combine textures and hues into a cohesive aesthetic.
Focus on how each piece handles under the awl. Not every scrap will have the same density, which makes this an excellent lesson in assessing material properties by touch.
Weaver Tooling Leather Remnants: Best for Carving
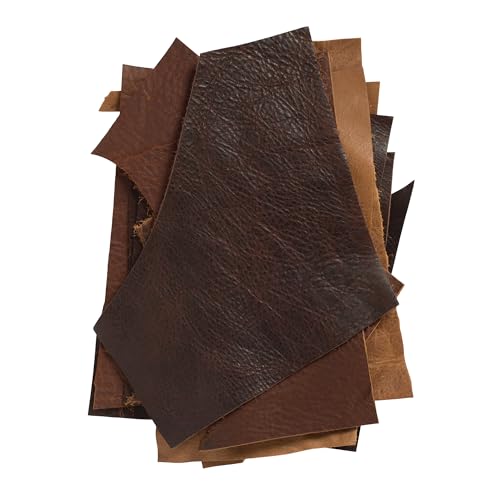
For makers interested in intricate carving and embossing, vegetable-tanned tooling leather is the only choice. Weaver provides remnants that hold a stamp’s impression and retain a permanent shape after wetting and drying.
This material acts like a stiff, high-twist cotton yarn; it responds beautifully to manipulation but requires precision. Use these pieces to practice beveling, swivel knife control, and background texturing.
Since tooling leather is firmer, it will teach you exactly how much pressure is needed for a clean stitch. If you find your hand cramping, adjust your grip; the leather will not give unless the technique is sound.
Kani Lavi Large Piece Scraps: For Bigger Swatches
Small bits of leather are fine for testing stitches, but they do not teach the nuances of cutting larger patterns or managing grain direction. Kani Lavi offers larger, more generous cuts that allow for testing structural integrity on a project-wide scale.
Using larger pieces is vital for learning to spot “flaws” or natural grain patterns that might affect a bag’s drape. Similar to how one must consider row gauge across a large back panel of a sweater, you must consider the leather’s “stretch” across a larger surface area.
These are the scraps to use when building your first actual utility items. They provide enough surface area to practice functional assembly without the high cost of a full side of hide.
How to Choose the Right Leather Scrap Bag
Start by defining the end goal of your practice. If the objective is to learn tooling, prioritize vegetable-tanned bags; if the goal is assembly and construction, prioritize garment or upholstery leathers.
Always look for a mix of thicknesses. Much like varying needle sizes for different yarn weights, you need to match your leather thickness to the strength of your thread and the size of your needles.
Evaluate the “temper” of the leather. A soft, floppy piece behaves differently under a sewing machine than a stiff, rigid piece meant for belt-making.
Essential Tools for Practicing on Leather Scraps
To get the most out of your scraps, start with a basic, high-quality kit. A sturdy stitching awl, a set of diamond-shaped stitching chisels, and waxed linen thread are non-negotiable for hand-stitching.

Include a poundo board or a dedicated cutting mat to protect your tools. Dull blades are the primary cause of ruined projects, as they cause the leather to bunch rather than slice cleanly.
Invest in a quality burnishing tool, typically made of wood. Achieving a glassy, sealed edge on your scrap pieces is the hallmark of a professional finish.
Key Techniques to Practice with Leather Remnants
Begin with the saddle stitch, which is the gold standard for durability. Consistent tension is as critical here as it is in knitting; if the stitches are too tight or loose, the leather will pucker.
Practice hole spacing and alignment using your stitching chisels. Creating a straight line of holes is harder than it looks, and this is the area where beginners most often go astray.
Experiment with edge finishing by sanding, applying edge paint, or using a burnishing agent. Compare the results of different methods to see which offers the most durability and visual appeal.
Scrap Grades: What to Expect From Your Purchase
Understand that “scraps” are inherently imperfect. They may contain small scars, insect bites, or uneven edges that reflect the life of the animal.
View these imperfections as “design features” rather than waste. In knitting, a dropped stitch might be a tragedy, but in leatherwork, a small mark often adds character and authenticity to the final piece.
Never expect every piece in a scrap bag to be usable for a high-end project. Use the ugly, oddly shaped, or flawed pieces to stress-test your tools or to create internal supports that will never be seen.
Learning to work with leather scraps turns the intimidation of expensive materials into a sandbox for creative growth. By methodically practicing stitches, edge work, and assembly on these remnants, you will build the technical confidence necessary for any major project. Keep your tools sharp, your practice sessions consistent, and your expectations grounded in the reality of the material.