6 Best Sewing Tutorials For Advanced Techniques
Master complex garment construction with these 6 best sewing tutorials for advanced techniques. Elevate your needlework skills and start your next project today.
Transitioning from simple seams to complex garment construction requires a shift in how one approaches tension, precision, and fabric manipulation. Much like learning to master brioche or intarsia, advanced sewing is about understanding the mechanical behavior of materials under pressure. These six tutorials provide the scaffolding necessary to move beyond basic straight stitches into the realm of professional tailoring. Mastering these specific skill sets ensures every project results in a garment that feels bespoke rather than homemade.
Closet Core’s Jasika Blazer: Best for Tailoring


Tailoring is the equivalent of complex cable work; it requires patience, internal structure, and a deep understanding of how fabric interacts with interfacing. The Jasika Blazer tutorial breaks down the overwhelming process of traditional tailoring into manageable, sequential steps. It teaches the vital skill of canvas shaping, which is essentially the architecture that gives a jacket its permanent, professional silhouette.
The real value here lies in the focus on internal support, such as shoulder pads, sleeve heads, and tailored canvas. Just as a heavy-weight wool requires a sturdy needle to avoid splitting fibers, tailoring fabric requires specific reinforcement to prevent bagging or distortion over time. Neglecting these hidden structural elements is a common mistake that turns a labor-intensive project into a limp, shapeless garment.
Ultimately, this tutorial is for the maker ready to invest twenty-plus hours into a single piece. It demands high-quality, stable fabrics like wool suiting or heavy linen. If the goal is a blazer that rivals high-end retail, following these precise, structural instructions is non-negotiable.
The Fold Line’s Welt Pockets: Best for Precision
Welt pockets are the true test of sewing accuracy, often causing more frustration than the most complex lace chart. This tutorial excels by demystifying the geometry involved in cutting and folding fabric into a clean, sharp opening. Precision in this area is paramount, as a deviation of even one millimeter can lead to puckering or uneven corners.
This technique is akin to working with delicate silk mohair; there is very little room for error once the cuts are made. The tutorial emphasizes consistent seam allowances and careful clipping, ensuring that the pocket sits flat against the body of the garment. Beginners often rush this stage, leading to sagging pockets that lack the crisp, crisp lines expected in professional tailoring.
Always practice the welt technique on scraps of the same weight and weave as the final garment. If the fabric has a high synthetic content, it may be prone to heat damage during pressing, so testing for scorch marks is essential. A well-executed welt pocket should be an invisible triumph of technical sewing.
Angela Wolf’s Couture Dress: Best for Finishing
Finishing techniques separate a garment that looks finished from one that looks truly refined. Angela Wolf’s approach focuses on couture-level details, such as hand-finished hems and internal clean-finishing, which provide durability and a high-end aesthetic. These finishing steps are similar to blocking a sweater to perfection; they define the final shape and texture of the work.
Couture finishing relies on subtle hand-sewing techniques that are hidden from the outside but improve the longevity of the garment. While machine sewing is efficient, some areas require the tactile sensitivity that only a needle and thread can provide. This tutorial teaches where to compromise speed for the sake of quality, preventing the common issue of raw seams fraying after a few washes.
These techniques are best applied to high-quality natural fibers like silk, fine wool, or cotton voile. Avoid overly heavy or stiff fabrics for these specific couture finishes, as they may become too bulky to manage by hand. The takeaway is that refined finishing turns a project into a legacy garment.
Tilly’s Button-Fly Jeans: Best for Denim Work
Denim is a stubborn, unforgiving fabric that requires specialized tools and techniques to conquer. Tilly’s tutorial for button-fly jeans addresses the unique challenges of sewing heavy-duty materials, including flat-felled seams and the installation of hardware. Sewing denim is like working with a high-twist, rustic wool yarn; it is thick, durable, and resistant to manipulation.
One must account for the thickness of the seams when passing under a standard sewing machine foot. Using a hump-jumper or a folded piece of cardboard to level the foot prevents skipped stitches and broken needles. Understanding how to navigate these bulky areas is what distinguishes a amateur denim project from one that looks store-bought.
Patience is required when working with heavy-weight denim. Ensure the needle is sharp and the stitch length is adjusted to accommodate the thread weight. The result is a pair of jeans that can withstand years of wear, provided the seams are reinforced correctly.
Craftsy’s Corset Making: Best for Structure
Corsets are an exercise in extreme structural integrity, necessitating a blend of boning, interlining, and tension management. The Craftsy corset-making course provides the technical expertise to create a garment that redistributes the body’s weight while maintaining a precise fit. This is the structural equivalent of designing a self-supporting, intricate cable-knit cardigan.
The core challenge involves managing multiple layers of stiff fabric without creating excessive bulk at the seams. Using boning channels correctly is vital; if they are not applied with exact tension, the corset will warp under pressure. This tutorial provides a clear framework for placing bones to achieve a smooth, contoured shape.
For those attempting a corset, material selection is critical. Do not attempt this project with thin, stretchy, or flimsy fabrics; they lack the tensile strength to hold their form. A structured corset project is a masterclass in garment engineering, requiring absolute adherence to the provided dimensions.
Evelyn Wood’s Shirt Making: Best for Collars
The collar is the focal point of any button-down shirt and serves as the ultimate indicator of construction quality. Evelyn Wood’s tutorial focuses on the precision of the collar stand and the point of the collar itself. Much like achieving a perfect kitchener stitch, setting a collar correctly requires rhythmic, steady, and precise movements.
The secret to a perfect collar is proper interfacing and meticulous pressing. If the interfacing is too thick or incorrectly applied, the collar will bubble or stand stiffly in an unnatural way. Understanding the grain line of the collar stand ensures it curves comfortably around the neck rather than pulling away.
Take the time to hand-baste the collar before sewing it permanently with the machine. This step provides control over the alignment and prevents the fabric layers from shifting. A well-constructed collar elevates a simple shirt into a sophisticated piece of apparel.
How to Choose Your Next Advanced Sewing Project
Select a project that pushes only one new skill at a time. If the goal is to learn tailoring, choose a pattern that focuses on structure rather than complex fitting adjustments. Matching the project to existing skill gaps prevents burnout and ensures that the final result remains wearable.
Consider the fabric requirements before committing to the pattern. If a project demands a specific weight of fabric, do not attempt to substitute with something from the stash unless it matches the properties required for structural integrity. Always check if the tutorial provides enough support for the specific fabric type intended for the project.
Assess the time investment against current availability. Advanced sewing, like complex lace knitting, cannot be rushed without sacrificing the quality of the finish. Choose a project that allows for a steady, incremental pace of learning.
Essential Tools for Advanced Sewing Techniques
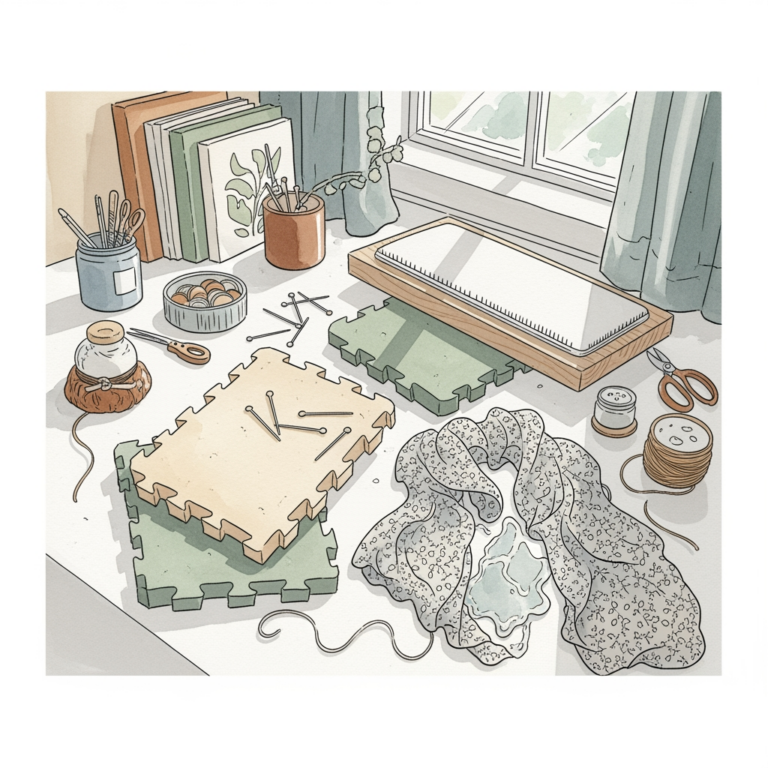
Advanced sewing requires tools that offer greater control and precision than standard home-sewing equipment. A tailor’s ham and a seam roll are indispensable for pressing curved seams, much like a set of quality blocking wires for lace. These tools ensure that the garment’s curves are pressed correctly, preventing the flat, lifeless look of poorly finished seams.
Invest in high-quality needles matched to the fabric weight. A microtex needle is superior for fine wovens, while a denim needle is necessary for heavy-duty work. Using the wrong needle is akin to using a blunt bamboo needle for lace; it causes frustration and damages the fibers of the fabric.
A quality rotary cutter and a heavy-duty acrylic ruler are also non-negotiable for precision cutting. Maintaining a sharp blade prevents the fabric from shifting under the ruler. These tools turn a tedious cutting process into a clean, accurate foundation for the work ahead.
What Makes a Sewing Tutorial Truly “Advanced”?
A truly advanced tutorial avoids hand-holding and instead provides the technical reasoning behind each step. It explains how to manipulate the grain, adjust for body variations, and handle specific fabric behaviors. It should treat the user as a maker who understands the fundamentals and is now seeking to refine the professional details.
Beyond the instructions, an advanced tutorial includes troubleshooting for common mistakes. It provides insight into the “why” rather than just the “how,” allowing the maker to adapt techniques to future projects. It encourages an analytical approach, treating each step as a deliberate choice in the garment’s construction.
Look for tutorials that include resources for further study or specialized tool recommendations. An advanced tutorial recognizes that equipment and material quality are as much a part of the process as the skill of the hands. It focuses on elevating the project to professional standards.
Pressing vs. Ironing: A Guide for Pro Finishes
Distinguishing between pressing and ironing is the most significant leap a sewer can take toward professional finishes. Ironing involves moving the iron back and forth, which can stretch or distort the grain of the fabric, much like dragging a knitting needle across delicate yarn. Pressing, however, requires a vertical, upward-and-downward motion that sets the seam and locks the fibers in place.
Use a pressing cloth to protect delicate fabrics like wool or silk from direct heat. This prevents the fabric from becoming shiny or singed, especially when using steam. If working with synthetic fibers, test the heat setting on a small swatch to ensure the fabric does not melt or distort.
A professional finish is only as good as the pressing that supports it. Always press each seam before sewing it to another piece of fabric. This simple habit ensures that the internal structure of the garment remains crisp and clean throughout the entire assembly process.
Mastering these advanced sewing techniques requires the same dedication to craft and detail that defines a lifelong fiber artist. By prioritizing structural integrity, precision, and proper tool use, any maker can elevate their sewing from basic assembly to the art of professional tailoring. Focus on one technique at a time, respect the unique properties of your chosen materials, and let the process lead to a more polished, rewarding output.