6 Leather Burnishing Tools For Polished Edge Finishes
Achieve professional-grade results with our guide to the 6 best leather burnishing tools. Learn how to create flawless edge finishes and shop our top picks today.
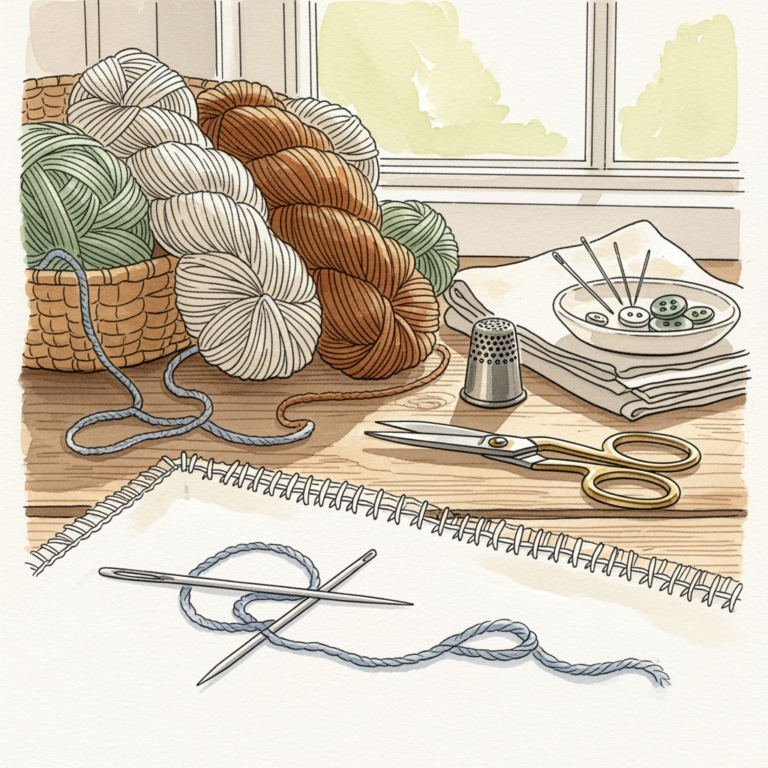
A polished edge on a leather project is much like the perfect tension on a hand-knit swatch: it elevates a simple craft into a professional-grade heirloom. Just as the wrong needle material can snag delicate silk-mohair or leave a bamboo project looking uneven, the wrong burnishing tool can leave edges fuzzy or scorched. Achieving that glass-like finish requires understanding how friction and pressure interact with leather fibers, similar to how one manages yarn ply and twist to achieve the perfect stitch definition. Choosing the right tool comes down to project volume, personal dexterity, and the desired aesthetic for the final piece.
Tandy Pro Cocobolo Edge Slicker: The Classic Hand Tool

The Cocobolo slicker acts as the wooden needle equivalent of the leather world—durable, reliable, and perfectly weighted. Its high density allows it to compress leather fibers without splintering, ensuring a smooth glide that won’t snag delicate grain surfaces.
This tool is ideal for those who prefer the tactile control of manual work, much like using hand-crafted rosewood needles for a complex lace shawl. The variety of grooves accommodates different thicknesses of leather, mirroring the way a knitter selects specific needle sizes for different yarn weights.
Because it relies on manual rhythm, it is excellent for small-scale projects where precision is paramount. While it requires more physical effort than a power tool, the consistency achieved through manual repetition often results in a more uniform edge for intricate leather goods.
Dremel with Burnisher Bit: For Speed and Consistency
A Dremel setup is the high-efficiency equivalent of a knitting machine or a yarn winder for the production-focused maker. It converts rotational energy into friction, allowing for the rapid compression of leather edges that would take hours to achieve by hand.
This tool is a lifesaver when working on large bags or multiple items that require long, continuous edges. Much like choosing a specific yarn for its speed-knitting properties, selecting a wooden or plastic bit for a Dremel requires care; too much speed can burn the leather, just as friction can melt synthetic fibers on the wrong needle type.
When using this method, start at a low RPM to avoid heat damage. It is the best choice for those who value efficiency, provided one is willing to monitor the heat buildup carefully to avoid glazing the leather.
Multi-Groove Wood Slicker: Best Budget-Friendly Pick

The multi-groove wooden slicker is the “workhorse” tool found in almost every well-stocked craft studio. It is uncomplicated, affordable, and handles a wide range of edge thicknesses, much like a standard set of aluminum needles that covers almost any beginner project.
While it lacks the exotic density of expensive hardwoods, it does exactly what it needs to do: create friction. For a beginner just starting to understand how natural edges respond to moisture and rubbing, this tool is the perfect entry point.
It may show wear faster than high-end options, but it remains a essential part of any kit. Think of it as a reliable set of needles that won’t break the bank while the craft is being mastered.
Barry King Glass Burnisher: For a Mirror-Like Shine
Glass burnishers are the secret weapon for those who demand a professional, glassy finish that traditional wood cannot always provide. Glass does not absorb moisture or burnishing agents, allowing for a cleaner transfer of pressure directly into the leather fibers.
Using this tool feels like transitioning from matte wooden needles to polished metal needles; the slip is faster and the result is sharper. It is particularly effective for thick vegetable-tanned leathers that require significant compression to lay flat.
Because glass is smooth and non-porous, it creates a unique, high-shine aesthetic. It is a specialized tool, best reserved for the final stages of a project where visual impact is the primary goal.
Heavy Canvas Duck Cloth: The Low-Tech, Simple Choice
Sometimes the most effective tool is the simplest, much like using a scrap of yarn to measure gauge instead of a plastic gauge ruler. A strip of heavy-duty, unbleached canvas duck cloth provides a unique, abrasive friction that is unmatched for final buffing.
After the edges have been shaped with a wooden tool, a vigorous rub with canvas removes remaining “fuzz” and seals the edge completely. It is the equivalent of a final blocking step, where the piece is smoothed and polished into its final shape.
It is inexpensive, portable, and gentle on the grain. Keep a piece of canvas in the tool box at all times to provide that final polish that differentiates a handmade item from a store-bought one.
Weaver Master Tools Edge Slicker: The Pro’s Choice
The Weaver Master Tools slicker is designed for those who treat leatherwork as a serious, long-term discipline. Engineered for longevity and ergonomic comfort, it handles repeated, heavy-duty use without losing its form or smoothness.
Much like an investment in interchangeable needle sets, this tool is meant to last for years. The shape is designed to fit the hand comfortably, preventing fatigue during long sessions of finishing belts or heavy saddlery.
For the serious maker, this is a “buy it once” item. It provides a level of consistency and tactile feedback that makes the burnishing process feel intuitive and effortless.
How to Choose Your Burnishing Agent: Water, Gum, or Wax?
Selecting a burnishing agent is as critical as selecting the right fiber for a project—whether one chooses wool for warmth or cotton for structure, the medium dictates the result. Water is the basic starting point, but it evaporates quickly and doesn’t provide long-term sealing.
Gum Tragacanth or Tokonole act as binding agents, filling the small gaps between fibers and creating a slick, permanent surface. Think of these as the “blocking solution” for leather; they provide the support needed for the edge to hold its shape.
Wax is the finishing touch, used to provide a water-resistant seal once the edge is already compressed and smooth. Always finish with wax if the item will see frequent outdoor use, just as one might treat a finished wool sweater with lanolin for extra weather protection.
Manual vs. Power Burnishing: Which Is Right for You?
Manual burnishing offers total control and is ideal for delicate pieces where excessive heat or friction could damage the grain. It is the equivalent of slow, rhythmic hand-knitting, allowing the maker to feel the progress of the leather fibers in real time.
Power burnishing is about volume and strength. It is necessary for thick, stubborn leathers that require extreme force to compress. However, it requires a steady hand and a keen eye to prevent the leather from becoming scorched or brittle from friction.
Evaluate the scope of the project before beginning. If the goal is a singular, intricate wallet, manual effort will yield the best results. If the goal is a dozen belts, a power tool is the only way to maintain sanity.
How to Prepare Your Leather Edges for Burnishing
A polished edge is only as good as the preparation that precedes it, much like the importance of a proper long-tail cast-on for a balanced garment hem. Start by sanding the edges with progressively finer grit sandpaper until they are perfectly flush and smooth.
If the edge is not sanded uniformly, no amount of burnishing will make it look professional. Use a sanding block to keep the edge at a perfect 90-degree angle, or bevel the edge if a rounded profile is desired.
Remove all dust from the sanding process before applying the burnishing agent. Even small particles of grit can ruin a finish and scratch the polished surface during the rubbing stage.
Troubleshooting Common Edge Finishing Problems
If the edge remains fuzzy, it often means the leather was not sanded smoothly enough or the burnishing agent was not allowed to set. Re-sand the edge with a finer grit and apply a light coat of agent before trying again.
If the edge looks burnt or dark, the friction was too intense, likely from a power tool moving too fast. Dial back the speed or pressure and ensure the tool is constantly moving to prevent heat buildup.
Finally, if the edge is not holding its shape, the leather may be too soft or “thirsty.” Use a high-quality edge sealer or consider a stiffer temper of leather for future projects, much like choosing a higher-twist yarn to avoid sagging in a finished garment.
Mastering the edge is a process of patience and precision, where the rewards are found in the clean, professional finish of the final piece. Just as every stitch contributes to the integrity of a sweater, every motion of the burnisher contributes to the longevity and beauty of a leather good.