6 Best Plastic Resists For Hollow Form Felting
Discover the 6 best plastic resists for hollow form felting. Learn which materials ensure structural integrity and seamless results for your fiber projects.
Hollow form felting is an art of patience and structural intuition, much like managing the tension in a complex cable project. Using a resist is the secret to creating seamless, three-dimensional shapes that hold their form long after the felting process is complete. Choosing the right material for your resist changes how the wool fibers migrate and how the final piece sits. Here are the six best materials to help you master the internal architecture of your felted work.
1. Polyethylene Foam Sheets for Flexible Felting


Polyethylene foam is the industry standard for a reason: it offers a gentle, cushioned resistance that allows wool fibers to shrink around it without creating harsh creases. It is essentially the "bamboo needle" of the felting world—forgiving, lightweight, and easy to handle.
Because it has a slight thickness, it creates a soft, rounded internal space that is perfect for hats, bags, or sculptural vessels. If you are a beginner, this is your best starting point because it doesn’t fight against your hands while you are rubbing the felt.
The main tradeoff is that it isn’t indestructible. Over time, the aggressive friction of fulling will cause the edges of the foam to fray or compress, eventually losing its shape.
2. Rigid Corrugated Plastic Boards for Stability

When you need a structure with true architectural integrity, turn to corrugated plastic, often sold as yard signs. This material provides a firm, unyielding surface that forces the wool to shrink against a precise, flat plane.
This is ideal for projects that require sharp corners or perfectly flat sides, such as structured boxes or modern geometric vessels. It acts like a metal needle; it provides zero give, so your wool must do all the work of conforming to the shape.
Be warned: because this material is so rigid, it is much harder to remove from a small opening. Plan your design so that the resist can be slid out easily once the felt has shrunk to the desired size.
3. Clear Vinyl Sheeting for Precise Shape Control

Clear vinyl is the "surgical tool" of the resist world. Because it is transparent, you can place it over a paper pattern and trace your design with absolute accuracy, ensuring your symmetry is perfect before you even lay down your first layer of roving.
It is thin, slick, and incredibly durable. Unlike foam, it won’t compress or degrade, making it the superior choice for high-volume production or projects that require a very thin wall thickness.
However, its slickness can be a double-edged sword. Wool fibers can sometimes slide around on the vinyl during the early stages of layout, so you must be extra diligent with your initial wetting and tacking down.
4. Heavy Duty Bubble Wrap for Texture and Release
Bubble wrap is the ultimate multitasker for the fiber artist. The air-filled pockets provide a natural "release" factor, making it much easier to slide the resist out of a felted piece once the process is complete.
Beyond its function as a resist, the bubbles provide a built-in texture tool. If you want to create a subtle, bumpy surface on the inside of your hollow form, simply leave the bubbles intact.
The drawback is that it is a one-time-use material for most projects. Once the bubbles pop during the vigorous rubbing and rolling of the felting process, the resist loses its structural integrity.
5. Recycled Plastic Produce Bags for Soft Forms

Sometimes the best tools are the ones you already have in your kitchen drawer. Thin plastic produce bags are excellent for creating organic, free-form shapes where you don’t want the rigidity of a board or foam sheet.
These are perfect for "slouchy" projects where you want the wool to collapse slightly into the form. They are incredibly thin, meaning you won’t have to account for significant bulk when calculating your shrinkage rates.
The trade-off is the lack of precision. These bags are prone to wrinkling, which will translate into unwanted creases in your finished felt. Use them only when you are aiming for a rustic, hand-hewn aesthetic.
6. Laminated Cardstock for Sharp Geometric Edges
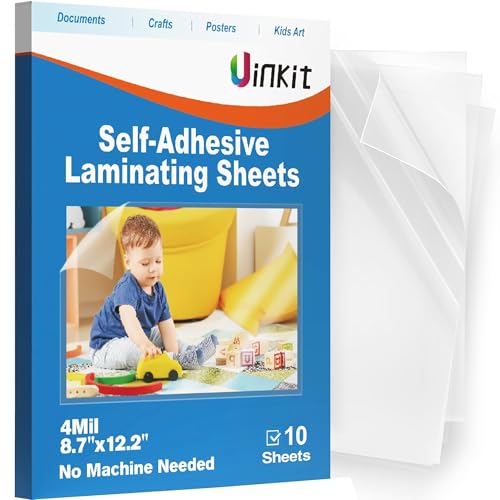
Laminated cardstock is a clever hack for makers who need custom shapes that aren’t available in standard plastic sheets. By printing a template and running it through a laminator, you create a waterproof, stiff resist that is perfectly tailored to your design.
This is the best way to achieve sharp, defined edges without investing in industrial-grade plastic cutting tools. It is surprisingly durable and can be reused for many projects if you handle it with care.
The critical consideration here is the seal. If the lamination isn’t perfect at the edges, moisture will seep into the paper core, causing the resist to warp or disintegrate mid-project.
7. How to Select the Right Resist for Your Project
Choosing a resist comes down to the "anatomy" of your final piece. If you are making a delicate, thin-walled vessel, go with a thin material like vinyl or a produce bag to minimize bulk.
If you are crafting a heavy-duty bag or a decorative home item that needs to stand upright, reach for the corrugated plastic or thick foam. Think of it like choosing the right needle material: wood for grip, metal for speed, and plastic for a middle-ground balance.
Always factor in your shrinkage rate. The thicker the resist, the more wool you need to account for the "stretch" around the internal volume of the form.
8. Essential Tips for Preventing Resist Adhesion
The biggest heartbreak in hollow felting is having your resist become permanently bonded to the interior of your work. The key to prevention is movement; during the early stages of felting, move the piece frequently to ensure the wool isn’t "grabbing" the resist.
If you are worried about sticking, you can lightly dust the resist with a tiny amount of soap or use a material with a textured surface. Never let the wool sit undisturbed for long periods while it is damp, as the fibers will naturally seek to interlock with any porous surface.
Bottom line: check your work every ten minutes. If the wool starts to feel like it’s gripping the resist, peel it back gently and reposition it.
9. Cleaning and Storing Your Plastic Resist Tools
Treat your resists like your favorite set of interchangeable needles. After each project, wash them with warm, soapy water to remove any residual wool oils or soap film.
Store them flat in a cool, dry place to prevent warping. If you fold your foam or vinyl, you will create a permanent crease that will show up as a "line" in every future project you make.
Investing in a simple flat file or a dedicated bin will keep your resists pristine. A well-organized studio is as important as a well-organized yarn stash.
10. Troubleshooting Common Hollow Felting Issues
If your felt is collapsing or won’t hold its shape, your resist might be too thin or your wool might be under-felted. Remember that the resist is only the scaffolding; the wool’s own structural density is what provides the final strength.
If you find that your resist is impossible to remove, don’t panic. Gently introduce a small amount of warm, soapy water into the opening to lubricate the surface, then work the resist out slowly, inch by inch, just as you would ease a tight garment over a form.
If your piece has unwanted creases, it usually means your resist was too large or the wool was laid down unevenly. Use these "mistakes" as a learning opportunity to refine your pattern for the next attempt.
Mastering the use of resists is a journey of trial and error that rewards the observant maker. By matching the rigidity of your material to the desired outcome of your project, you gain total control over your hollow forms. Don’t be afraid to experiment with these materials to see which ones suit your specific hand pressure and felting style. With the right resist in place, your felted work will transition from a simple craft to a professional, sculptural piece of art.