
7 Best Leather Rivet Setters For Bag Handles To Own
Master leather crafting with our top 7 rivet setters. Discover durable, precise tools essential for securing bag handles and achieving a professional finish.
Much like selecting the perfect circular needle for a complex lace shawl, choosing a rivet setter for your handmade bags requires matching the tool to the specific demands of your material. A sturdy leather handle is the structural equivalent of a well-turned heel, providing the support necessary to carry the weight of your fiber creations. Whether you are attaching straps to a felted tote or a structured wool-blend carryall, the right hardware ensures your bag lasts as long as your hand-knit stitches. Here are seven top-tier rivet setters to help you achieve a professional finish every time.
Tandy Leather Deluxe Rivet Setter: Best Overall


When you need a tool that bridges the gap between hobbyist and serious maker, the Tandy Deluxe is a reliable workhorse. It handles standard double-cap rivets with a consistent strike, ensuring the dome stays centered and smooth.
Think of this like a classic, high-quality nickel-plated needle; it isn’t flashy, but it does exactly what it’s supposed to do without snagging your work. It’s perfect for those who want a professional look on their bag handles without investing in heavy industrial machinery.
The tradeoff here is that it requires a steady hand and a good mallet. If you’ve ever struggled with uneven tension in your knitting, you know that practice is key, and the same applies to getting that perfect, flush rivet finish.
Weaver Leather Pro Line Setter: Best Professional

The Weaver Pro Line is built for the maker who treats bag-making with the same reverence as a master knitter approaches a complex fair isle sweater. These setters are precision-machined to withstand years of heavy use without deforming or dulling.
If you are working with thick, vegetable-tanned leather straps that need to support heavy bags, this tool provides the structural integrity required. It’s an investment piece, much like a set of handcrafted wooden needles that you plan to pass down to the next generation of makers.
While the price point is higher, the consistency it offers is unmatched. You won’t find yourself dealing with crushed or lopsided rivets, which can be the difference between a bag that looks "homemade" and one that looks like a boutique purchase.
Craftool Adjustable Rivet Die: Best for Versatility

Versatility is the hallmark of the Craftool Adjustable Die, which allows you to switch between different rivet sizes with a simple twist. It’s the "interchangeable needle set" of the leatherworking world, saving you from needing a drawer full of individual tools.
This is ideal for the maker who experiments with various bag styles, from small clutches requiring delicate hardware to large totes needing heavy-duty reinforcements. It keeps your workspace tidy and your essential gear accessible.
However, keep in mind that adjustable parts can sometimes feel less rigid than a solid, single-piece tool. Ensure the locking mechanism is tightened securely before you strike, much like checking your needle tips are snug before starting a new row.
Buckleguy Solid Brass Rivet Setter: Best Durability

There is a tactile satisfaction in using solid brass, much like the weight of a well-balanced metal knitting needle in your palm. The Buckleguy setter is virtually indestructible, designed to handle the impact of a mallet for years without showing wear.
Because it is solid brass, it won’t rust or corrode, making it a permanent fixture in your toolkit. If you live in a humid climate where your knitting needles might occasionally show signs of oxidation if left out, this tool offers a worry-free alternative.
The weight of the tool actually assists in the setting process, providing a solid base that helps drive the rivet home. Just remember to use a non-marring mallet to protect the tool’s finish, just as you would protect the tips of your favorite needles.
General Tools 1261 Rivet Tool: Best Budget Option
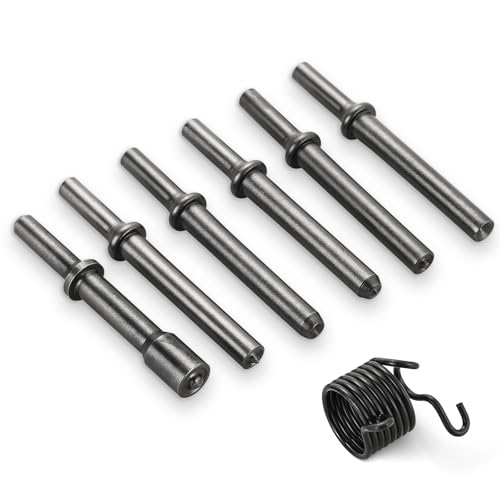
If you are just beginning to incorporate leather handles into your fiber projects, you don’t need to break the bank. The General Tools 1261 is an accessible, entry-level option that gets the job done for basic repair and small bag projects.
It’s the equivalent of starting your knitting journey with a basic pair of aluminum needles; they are functional, easy to find, and perfect for learning the mechanics of the craft. You can always upgrade later once you’ve mastered your technique.
The main tradeoff is that it lacks the fine-tuned precision of the professional-grade setters. You may need to take extra care to ensure the rivet stays centered during the strike to avoid a slightly flattened or skewed appearance.
Goldstar Tool Universal Setter: Best for Beginners
The Goldstar Universal Setter is designed to be user-friendly, removing the guesswork from the rivet-setting process. It acts as a guide, keeping the rivet in place while you apply force, which is a massive help for those still developing their hand-eye coordination.
Think of this as the "stitch marker" of rivet setters; it provides a clear boundary and keeps everything exactly where it needs to be. For a beginner, this reduces the frustration of dropped rivets or damaged leather surfaces.
It is a great way to build confidence before moving on to more specialized, single-purpose tools. Once you’ve set a few dozen rivets with this, you’ll have a much better understanding of the force and alignment required for professional results.
Seiwa Japanese Steel Rivet Setter: Best Precision
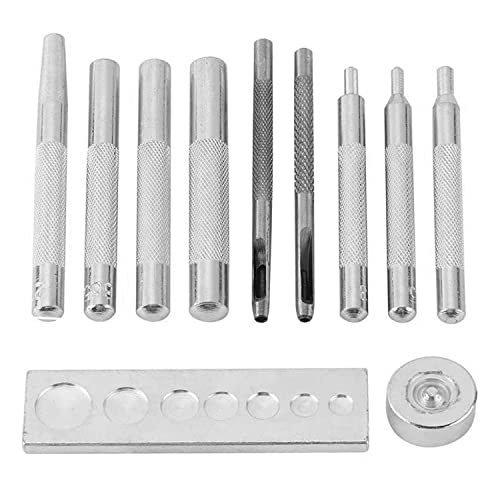
Japanese steel is legendary for its edge retention and precision, and the Seiwa setter is no exception. This tool is for the maker who demands absolute perfection in every detail, from the tension of their stitches to the placement of their hardware.
The precision of the cup allows for a perfectly rounded rivet cap every single time. It feels like knitting with high-end, smooth-as-glass needles—there is no resistance, just a clean, efficient process that produces a flawless outcome.
Because it is so precise, it is less forgiving of poor alignment. You must ensure your rivet is perfectly perpendicular to the base before striking, as the tool won’t compensate for a sloppy setup.
How to Choose the Right Rivet Setter for Your Bags
Choosing a setter is very similar to choosing the right yarn weight and needle size for a project. You must consider the thickness of your leather, the size of the rivet, and the frequency of your bag-making.
- Size Compatibility: Ensure the setter’s cup matches the diameter of your rivet head.
- Material Strength: Heavier leathers require hardened steel tools to avoid damaging the setter.
- Frequency of Use: If you make bags daily, invest in professional-grade steel or brass.
- Skill Level: Beginners should look for tools with guide features to prevent slipping.
If you are working with delicate, thin leather, a lighter strike with a precision tool is essential to avoid punching through the material. Always match your tool to the "gauge" of your leather, just as you would match your needle size to your yarn’s WPI (Wraps Per Inch).
Essential Tips for Setting Rivets Without Damage
Protecting your leather is just as important as blocking your finished knitwear to perfection. Always work on a solid, non-bouncing surface, such as a granite slab or a heavy-duty anvil, to ensure the energy of the strike goes into the rivet, not the floor.
- Use a Mallet, Not a Hammer: A leather or rawhide mallet prevents marring the surface of the rivet.
- Check Your Alignment: A quick visual check from two angles ensures the setter is perfectly vertical.
- Don’t Over-Strike: Much like over-stretching a wool sweater, too much force can deform the rivet and weaken the surrounding leather.
- Protect the Surface: Use a scrap piece of leather under your bag handle to prevent the base of the rivet from scratching your work surface.
If your leather is particularly soft or prone to tearing, consider using a small washer on the back side of the rivet. This distributes the pressure, similar to how a reinforcement stitch prevents a buttonhole from stretching out over time.
Troubleshooting Common Rivet Setting Mistakes
Even the most experienced makers run into trouble, just as we all eventually deal with a split yarn or a dropped stitch. If your rivet is lopsided, it’s usually because the setter wasn’t held perfectly vertical during the strike.
If the rivet cap is crushed or flattened, you likely used too much force or the wrong size setter cup. Remember that it’s better to start with a lighter tap and increase force gradually, rather than swinging for the fences on the first go.
Finally, if the rivet is loose, the post may be too long for the thickness of the leather you are using. You can trim the post slightly with wire cutters, or add a thin layer of leather backing to take up the extra space, ensuring a snug, professional fit every time.
Integrating hardware into your fiber arts projects is a rewarding way to elevate your work from a simple accessory to a functional heirloom. By choosing the right rivet setter and approaching the process with the same care you give your tension and gauge, you will ensure your bag handles are as durable as they are beautiful. Take your time, practice on scrap material, and enjoy the process of adding that final, professional touch to your handmade creations. Happy making!