6 Best Knitwear Finishing Needles For Hiding Tails
Master your knitwear with our top 6 finishing needles. Learn which tools best hide yarn tails for a seamless, professional look on every handmade project.
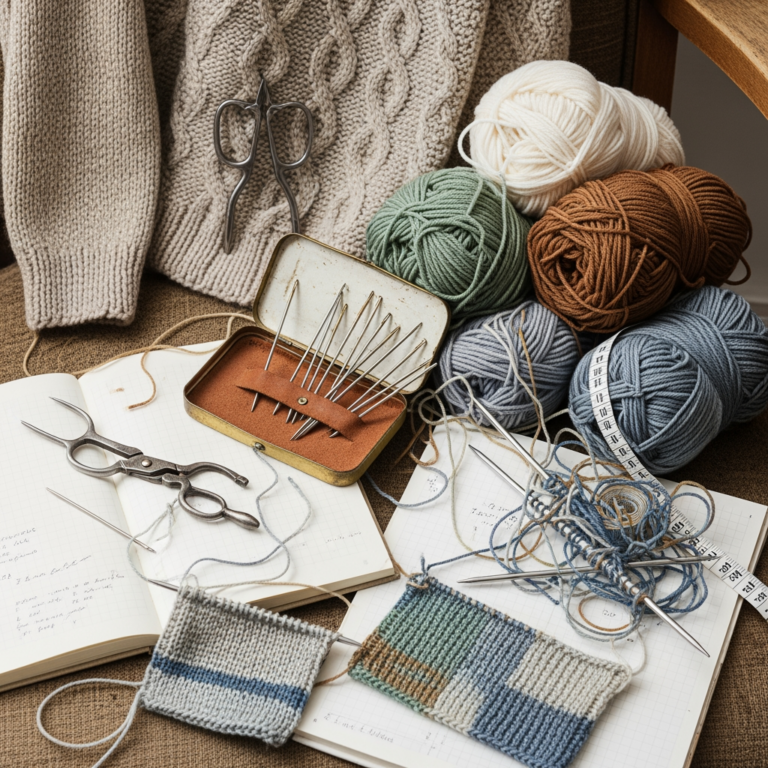
Finishing a project is often the most overlooked part of the knitting process, yet it is what separates a homemade item from a professional-looking garment. Choosing the right tapestry needle is the secret to ensuring your hard work doesn’t unravel after a few wears. This guide explores the best tools to help you secure your yarn tails with confidence and precision. Whether you are working with delicate lace or chunky wool, the right needle makes all the difference.
Clover Chibi Bent Tip Tapestry Needles: Best Overall

These needles are a staple in almost every serious knitter’s notions bag for good reason. The signature bent tip allows you to scoop up stitches from the back of your work without piercing the fiber itself.
I find these particularly useful when working on dense colorwork or brioche. You can slide the tip under the "v" of a stitch effortlessly, ensuring the tail stays hidden within the fabric structure.
The set comes in a convenient, portable case that prevents you from losing needles in the couch cushions. The bent tip is the standout feature here, as it minimizes the risk of splitting your yarn.
Dritz Yarn Darner Needles: Best for Thick Yarns
When you are working with bulky, super-bulky, or unspun roving yarns, standard tapestry needles often feel too small. Dritz Yarn Darners have a large eye that accommodates these thicker fibers without fraying them.

Because the eye is generous, you won’t spend ten minutes trying to thread a stubborn, fuzzy mohair blend. The shaft is sturdy enough to handle the tension required when pulling heavy yarn through a tight bind-off.
Keep in mind that these are generally straight, which requires a bit more dexterity to navigate the back of your stitches. If you frequently knit blankets or chunky sweaters, these are an essential addition to your toolkit.
ChiaoGoo Stainless Steel Finishing Needles: Durable

Stainless steel is the gold standard for durability in knitting tools. These needles won’t bend, rust, or develop burrs that snag on delicate fibers like silk or alpaca.
The finish is incredibly smooth, allowing the needle to glide through your work with minimal resistance. This is vital when you’re weaving ends into a tight, high-twist sock yarn where space is at a premium.
While they are slightly heavier than plastic or aluminum alternatives, the weight actually provides a nice tactile feedback. They are virtually indestructible, making them a one-time investment for your knitting career.
Bohin France Tapestry Needles: Smooth Tip Quality

Bohin has a long-standing reputation for manufacturing high-quality steel tools. The tips on these needles are rounded just enough to prevent snagging, but sharp enough to navigate tight stitch patterns.
I often reach for these when working with high-end wools that are prone to pilling. A rough needle tip can pull at the fiber, creating unwanted fuzz on the right side of your project.
The quality of the plating on these needles ensures they remain smooth even after years of use. If you prioritize a snag-free experience, the precision of Bohin’s manufacturing is hard to beat.
Cocoknits Steel Stitch Needles: Best for Precision
Cocoknits has designed these with the modern knitter in mind, focusing on a flat, nylon-coated finish that grips the yarn slightly. This is incredibly helpful when you are working with slippery fibers like bamboo or mercerized cotton.
The needles are designed to be slightly flexible, which helps when you need to weave in ends on curved edges like necklines or armholes. They feel very natural in the hand and don’t tire your fingers during long finishing sessions.
They also come in a lovely, branded metal tube that fits perfectly in a project bag. The slight grip provided by the material makes them the superior choice for slick, synthetic, or plant-based fibers.
Tulip Etimo Tapestry Needles: Best Ergonomic Grip

Tulip is renowned for their ergonomic design, and these needles are no exception. They feature a unique, polished tip that is designed to pass through fabric with almost zero friction.
What sets these apart is the slightly flattened section of the shaft, which gives your fingers a natural place to rest. If you have arthritis or hand fatigue, these needles will significantly reduce the strain of weaving in dozens of ends.
They are undoubtedly a premium purchase, but the comfort they provide is worth the cost for large projects. If you are finishing a full-length sweater, your hands will thank you for using these.
Selecting the Right Needle Size for Your Yarn Weight
The golden rule of weaving in ends is that your needle should be slightly smaller than the needle you used to knit the project. This allows the tool to pass through the fabric without stretching the stitches out of shape.
For lace-weight or fingering-weight yarn, look for a size 22 or 24 needle. If you are working with worsted or bulky yarn, move up to a size 16 or 18.
- Fingering/Sock: Use size 24-26.
- DK/Worsted: Use size 18-20.
- Bulky/Super Bulky: Use size 13-16.
Always test your needle by inserting it into a spare swatch before going into your finished garment.
Why Bent Tips Make Weaving Ends Significantly Easier
Bent tips are a game-changer because they allow you to work "blind" on the back of the fabric. You can hook the needle into the back loop of a stitch without needing to pull the fabric taut or flip it over constantly.
This design is particularly effective for "duplicate stitch" weaving, where you follow the path of the existing yarn. The curve of the needle mimics the natural tension of the stitch, preventing you from pulling too tight.
I recommend bent tips for beginners because they remove the frustration of accidentally poking through to the front of the work. Once you try a bent tip, you will likely never want to go back to a straight needle.
Essential Techniques for Invisible Tail Integration
The secret to invisible ends is to follow the path of the yarn rather than cutting across the fabric. By mirroring the existing stitch pattern, the tail becomes indistinguishable from the knitted structure.
Avoid pulling the yarn too tightly, as this will create a visible puckering on the right side of the fabric. Instead, leave a tiny bit of "ease" in the tail to account for the natural movement of the garment.
- Duplicate Stitch: Follow the path of the V-shape.
- Vertical Weaving: Work into the purl bumps on the back side.
- Horizontal Weaving: Follow the path of the yarn across the row.
Always weave in at least 2-3 inches of yarn to ensure the tail doesn’t work its way out over time.
How to Properly Secure Ends in Delicate Fiber Blends
Delicate fibers like silk, mohair, or alpaca can be slippery, meaning ends have a tendency to wiggle out after a few washes. For these fibers, I recommend splitting the yarn tail if it is multi-ply.
Thread one half of the plies through the needle and the other half through a different path. This creates a "knotless" anchor that is much more secure than weaving the entire thickness of the yarn in one direction.
If you are working with a superwash wool, which is naturally slippery, be extra diligent about weaving in multiple directions. Changing direction at least once acts as a locking mechanism that prevents the tail from migrating.
Mastering the art of finishing is the final step in your journey toward becoming a confident, well-rounded knitter. By selecting the right needle for your specific yarn and using techniques that respect the fiber’s structure, your projects will look polished for years to come. Don’t rush this final stage, as it is the true hallmark of your craftsmanship. Happy knitting, and may your ends always stay securely tucked away.