6 Best Warping Frames For Direct Warping To Try
Discover the top six warping frames for direct warping. This guide evaluates stability, ease of use, and efficiency to help you streamline your weaving setup.
Mastering the art of warping is the single most transformative step a fiber artist can take to elevate their weaving practice from hobbyist to artisan. Whether you are preparing a delicate silk warp for a scarf or a sturdy wool blend for a rug, the right frame dictates the tension and consistency of your finished cloth. Direct warping is a rhythmic, meditative process, but it requires tools that can stand up to the physical demands of high-tension fiber management. This guide breaks down the best equipment to ensure your warp is perfectly measured, stable, and ready for the loom.
Schacht Flip Rigid Heddle Loom Warping Board
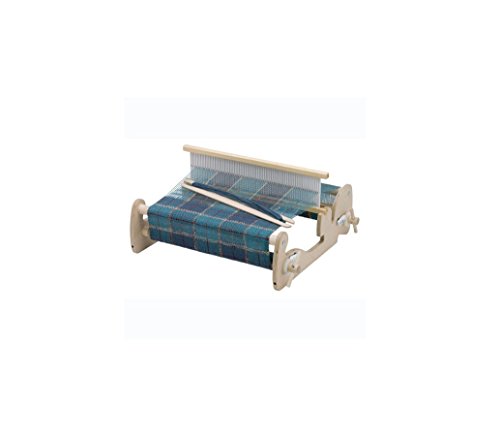

The Schacht Flip warping board is a masterclass in space-saving engineering for the modern weaver. It attaches directly to the back of the loom, which is a game-changer if you are working in a cramped studio or a shared living space.
Because it mounts to the loom, you don’t have to worry about the warp shifting across the room during the winding process. It keeps everything contained and taut, which is vital when you’re working with slippery fibers like bamboo or Tencel that tend to lose tension easily.
The pegs are spaced perfectly for standard rigid heddle projects, though they might feel a bit tight if you are trying to wind an exceptionally long warp. If you value efficiency and a tidy workspace, this is your best bet.
Ashford 11-Yard Tabletop Warping Frame Review

If you are just starting your journey into weaving, the Ashford 11-yard tabletop frame offers a manageable scale that won’t overwhelm your workspace. It’s a sturdy, reliable piece of equipment that handles everything from fine cottons to bulky wools with ease.
The compact nature of this frame makes it ideal for smaller projects like table runners or narrow wall hangings. However, because it is smaller, you will find yourself winding more often if you are planning a large-scale project.
Think of this as the "starter kit" that never truly goes out of style. It is simple to assemble and even easier to store, making it a favorite for those who only weave intermittently.
Leclerc Floor Standing Warping Mill Analysis
When you graduate to longer warps—think 10 to 20 yards—a floor-standing mill becomes an absolute necessity. The Leclerc mill rotates smoothly, allowing you to wind your warp with a consistent, rhythmic speed that prevents tangles.
The vertical orientation of this mill saves significant floor space compared to a horizontal board, which is a huge plus for those of us with dedicated craft rooms. It’s built like a tank, designed to handle the heavy tension required for rug weaving or heavy-duty tapestry work.
Just be prepared for a bit of a learning curve regarding the "cross." Once you master the technique, though, you will wonder how you ever managed without it.
Kromski 3-Yard Warping Board for Beginners
The Kromski 3-yard board is all about accessibility and visual clarity. Its design is straightforward, making it the perfect tool for beginners who are still learning how to manage their cross and maintain even tension across multiple threads.
While 3 yards might seem limiting, it is actually the perfect length for learning the mechanics of warping without getting lost in a sea of yarn. It is a fantastic way to practice your tensioning skills before moving on to more complex, longer-warp projects.
It is lightweight and portable, meaning you can easily move it to a table or even prop it against a wall. It is a humble tool, but it does exactly what it needs to do without any unnecessary bells and whistles.
Glimakra Large Vertical Warping Mill Features
The Glimakra mill is the gold standard for production weavers and those tackling intricate, long-warp projects. Its sheer size and stability allow you to wind massive amounts of yarn without the frame ever feeling like it might tip or wobble.
What sets this apart is the precision of the hardware; the rotating mechanism is incredibly smooth, which is essential for maintaining consistent tension. If your tension is uneven here, it will show up as "stripes" or loose threads in your finished fabric.
This is an investment piece, certainly, but it is one that will last a lifetime. If you see yourself weaving full-sized blankets or curtains, this is the mill that will grow with your skill level.
Louet Universal Warping Mill Pros and Cons

The Louet Universal mill is famous for its versatility and its ability to handle a wide range of warp lengths. It is a hybrid of sorts, offering the benefits of a mill with a footprint that isn’t quite as intimidating as the massive professional models.
The primary pro is its smooth rotation and excellent build quality, which makes winding feel almost effortless. The con, however, is that it requires a bit more dedicated floor space than a simple board, and it can be a bit tricky to store if your studio is small.
Ultimately, it strikes a balance between professional performance and home-studio practicality. It is a fantastic middle-ground choice for the intermediate weaver.
How to Choose the Best Frame for Your Project
Choosing the right frame comes down to three factors: the length of your warp, the space you have available, and the type of yarn you are using. If you are working with delicate, high-twist yarns, you need a frame that allows for very precise tension control.
For short, experimental warps, a small board is more than sufficient and keeps your setup time to a minimum. If you are committing to a long-term project like a multi-yard rug, a mill is non-negotiable for safety and speed.
Always consider your own physical comfort, too. If you have back or shoulder issues, a floor-standing mill that allows you to stand upright is far superior to a board that requires you to hunch over a table.
Essential Tips for Successful Direct Warping
The secret to successful direct warping is all in the tension of your "cross." Always ensure your threads are crossing cleanly, as this is the only thing keeping your warp organized when you transfer it to the loom.
- Maintain a consistent rhythm: Don’t rush; let the yarn flow through your fingers at a steady pace.
- Use a tensioning device: If available, a tensioning box can take the strain off your hands.
- Check your ends: Count your warp ends twice before you start winding to avoid frustration later.
Remember that "direct" warping means you are winding onto the loom as you go, so keep your workspace clear. Any snag in your yarn path will translate directly into a loose section in your warp.
Comparing Warping Boards Versus Warping Mills
Warping boards are best for short, quick projects and offer a high degree of control for beginners. They are stationary, which makes them easy to manage, but they become cumbersome as the length of your warp increases.
Warping mills, on the other hand, are the workhorses of the weaving world. They allow you to wind long warps in a continuous, flowing motion, which is much faster than the back-and-forth motion required on a board.
If you are a hobbyist, a board is often enough. If you are a producer, a mill is essential. Choose based on how much time you want to spend "prepping" versus "weaving."
Common Mistakes to Avoid When Measuring Warp
The most common mistake is failing to account for "take-up" and "loom waste." You must always calculate extra length for the portion of the warp that cannot be woven and the amount the yarn shrinks or draws in during the process.
Another frequent error is inconsistent tensioning while winding. If you pull tight on one thread and loose on the next, your weaving will have visible "sags" that are nearly impossible to fix once the fabric is off the loom.
Finally, never forget to secure your cross properly before removing the warp from the frame. If that cross slips, you are looking at hours of untangling—a mistake you will only make once.
Selecting the right warping tool is an investment in the quality of your future textiles and the longevity of your craft. Whether you opt for the space-saving convenience of a Schacht board or the professional-grade performance of a Glimakra mill, your choice should reflect your project goals and your physical workspace. Remember that the best tool is the one that makes you feel confident and in control of your fiber. Take your time with the setup, keep your tension consistent, and enjoy the rhythmic process of preparing your loom for the magic of weaving.