
6 Best Decoupage Glues For Adding Paper Textures To Wood
Discover the 6 best decoupage glues for adding paper textures to wood projects. Read our expert guide to choose the right adhesive and perfect your finish today.
Just as selecting the right tension for a delicate lace shawl depends on the drape of the yarn, choosing a decoupage glue for wood requires matching the medium to the texture of the paper. Wood acts much like a raw, unblocked garment; it needs the right preparation and support to ensure the final application remains smooth and professional. Whether embellishing storage boxes for notions or creating custom wall art for the craft room, the adhesive serves as the structural foundation of the project. Mastering these mediums is as essential as understanding the difference between a high-twist wool and a soft alpaca blend.
Mod Podge Matte: The All-Purpose Classic


Mod Podge Matte remains the industry standard for a reason, much like a reliable set of bamboo needles is a staple for a new knitter. It provides a non-reflective finish that allows the fine details of paper patterns to shine without the distraction of glare.
This medium is forgiving, offering enough open time to reposition delicate paper overlays before the bond sets firmly. It behaves consistently across various wood grains, mirroring the way a standard worsted weight yarn provides predictable results on a basic stockinette stitch.
Expect a slight tackiness if the humidity is high, which can be reminiscent of how certain plant fibers behave in damp climates. For a matte, professional look that doesn’t compete with the art itself, this is the safest starting point.
Liquitex Matte Medium: The Artist’s Choice
Liquitex Matte Medium is technically an acrylic painting additive, but its archival quality makes it a superior choice for wood decoupage. It dries with a clarity that surpasses standard crafting glues, ensuring that the vibrancy of the paper’s ink remains true over time.
Think of this as the equivalent of using a high-end silk-mohair blend; it requires a bit more care and finesse, but the aesthetic payoff is significantly more refined. It is thinner than traditional decoupage glues, allowing for a flatter, more professional bond that feels integral to the wood.
Because it lacks the bulk of standard craft glues, it is ideal for thin tissue papers or napkins. Use this when the goal is to create a surface that looks like it was printed directly onto the grain.
Aleene’s Collage Podge: For Thicker Layers
Aleene’s Collage Podge is formulated with a higher viscosity, making it an excellent choice for heavier textures or thick, decorative cardstocks. When the wood surface has imperfections, the thicker body of this adhesive acts like a filler, smoothing out the substrate.
It provides a robust bond, similar to the extra strength required when seaming a heavy, cabled wool sweater. If the paper being applied is structural or has a substantial weight, a thin glue will fail to hold it securely against the wood.
Be mindful that the thicker consistency may leave visible brush strokes if not applied with a light touch. It is best suited for rustic projects where a slightly textured, handcrafted finish is desired.
DecoArt Americana Decou-Page: For Outdoor Use
For projects that will live in a sun-drenched sunroom or a screened-in porch, choose DecoArt Americana Decou-Page. It offers a degree of moisture resistance that standard craft glues lack, preventing the paper from lifting or yellowing when exposed to environmental changes.
Much like choosing a superwash treated wool for a project that requires frequent laundering, this product is designed for endurance. It creates a tougher film that withstands the temperature fluctuations common in non-climate-controlled spaces.
The formula is specifically designed to resist yellowing, ensuring that the bright whites of your paper remain crisp. If the wooden item will see daily handling or sit near an open window, this is the practical choice.
Royal Coat Decoupage Finish: Best for Durability
Royal Coat is often favored by those looking for a finish that mimics the hardness of a professional varnish. It builds up quickly, providing a protective shell that guards against scratches and dings, much like a dense, tightly spun wool protects a sock heel from wear.
This is the product to reach for when decoupage is applied to tabletops or items subjected to frequent contact. It dries to a smooth, hard surface that feels substantial rather than paper-thin.
While it requires longer drying times between coats, the patience invested results in a significantly more permanent outcome. It is the closest one can get to a professional furniture-grade finish without using volatile solvents.
Elmer’s Craft Bond Decoupage: Budget-Friendly
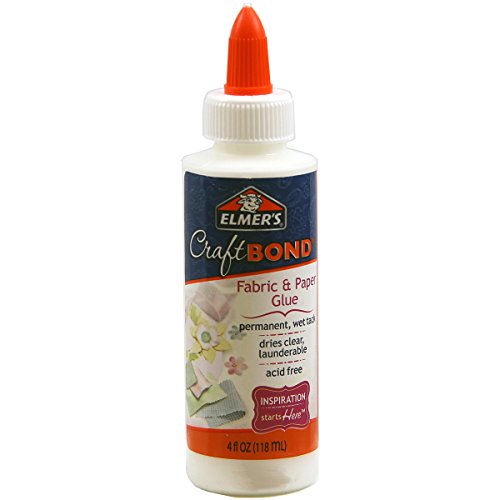
Elmer’s Craft Bond offers a straightforward, no-nonsense application that is ideal for beginners or high-volume projects. It is consistent, easy to source, and functions reliably for simple paper-to-wood applications where high-end archival protection is not the primary requirement.
It functions much like a standard acrylic yarn; it performs its job efficiently without unnecessary fuss or complexity. For those just learning the technique, this glue allows for repeated practice without a significant financial investment.
Do not expect the high-end clarity of artist-grade mediums, as it can occasionally dry with a slightly milky tint if applied too thickly. It is a workhorse adhesive that gets the job done when the project scope is simple.
How to Choose Your Decoupage Glue Finish
Choosing the right finish depends entirely on the intended environment and the weight of the paper. Use the following guide to help determine the best match:
- Matte: Best for hiding imperfections and creating a natural, subtle look.
- Gloss: Recommended for projects where the goal is to make colors pop and mimic a lacquered appearance.
- Satin: The middle ground, offering a slight sheen that is easier to keep clean than matte but less blinding than gloss.
Consider how the finished piece will be handled; decorative wall hangings can get away with a matte finish, while frequently used trays demand a harder, satin or gloss sealant. Always match the “weight” of the glue to the thickness of the paper to ensure a seamless bond.
Prepping Wood Surfaces for a Perfect Bond
Preparation is the most critical step in ensuring the paper adheres smoothly to the wood grain. Start by sanding the wood with a fine-grit sandpaper to remove any splinters or factory-applied sealants that could prevent the glue from soaking into the fibers.
If the wood is porous, it may absorb too much adhesive, leading to a weak bond. A quick coat of watered-down white glue or a dedicated primer will seal the surface and provide a consistent base for the decoupage.
Much like blocking a knitted garment to set its shape, cleaning the surface of all dust before starting is essential. Even a few stray fibers can create bumps underneath the paper, ruining the final appearance.
Tips for a Smooth, Bubble-Free Application
Bubbles are the enemy of a clean decoupage finish, appearing as unwanted pockets of air beneath the paper. Apply the glue to the wood first, then use a brayer or a flat plastic card to press the paper down, working from the center outward to push air to the edges.
If a bubble remains, it is often better to leave it until the glue is dry; sometimes the paper shrinks as it sets, naturally pulling the bubble flat. Attempting to lift wet, saturated paper often leads to tearing, just as pulling on a live stitch can cause a dropped stitch in knitting.
For larger surfaces, apply the glue in sections to ensure it does not dry before the paper is positioned correctly. A slow, methodical pace is always superior to rushing the application.
Sealing Your Project for Long-Lasting Beauty
Once the decoupage is dry, applying a final sealer coat adds a crucial layer of protection. This locks the paper in place and prevents the edges from curling over time.
Choose a sealer that is compatible with the decoupage glue to prevent any potential chemical reaction or cloudiness. A light spray sealer can be effective, but a brushed-on final coat of the same decoupage medium often offers more durability.
Think of this final step as the “weaving in of the ends” in knitting; it provides security and ensures the project will hold up to use. A well-sealed project will resist humidity, dust, and light contact for years to come.
By carefully selecting your adhesive and preparing the wood surface with the same attention to detail you apply to your gauge swatches, you ensure every decoupage project will stand the test of time. Whether you choose the reliable classic of Mod Podge or the artist-grade quality of Liquitex, the final result will be a polished, professional piece of craft.