
6 Best Scrapbooking Glue Erasers For Cleanup
Struggling with sticky adhesive residue? Discover the 6 best scrapbooking glue erasers to clean your projects easily. Read our guide and pick your favorite today.
Every crafter knows the frustration of a stray smear of glue marring the finish of a meticulously pieced project. Whether mounting swatches for a portfolio or securing embellishments onto a handmade garment, adhesive residue is the enemy of professional quality. While scrapbooking tools are designed for paper, these glue erasers are essential for fiber artists who frequently handle labels, stiffened motifs, or mixed-media fabric projects. Selecting the right tool ensures that excess adhesive is removed without damaging delicate surfaces or pulling at fibers.
Tombow Mono Sand Eraser: Best for Precision Work


This specialized tool functions like a fine-grit sandpaper block, making it ideal for targeting tiny, stubborn bits of dried glue. Its abrasive texture is perfect for when a project requires extreme accuracy, such as cleaning up adhesive near the edge of a delicate lace appliqué or a stiffened felt detail.

Because of its abrasive nature, it must be used with a light touch to avoid fraying fibers or thinning the substrate. It acts similarly to how one might carefully shave pilling off a high-end cashmere sweater—gentle, repetitive motions are the key to success.
If the goal is removing a small glob of runaway tacky glue from a non-porous surface, this is the superior choice. Reserve this tool for high-detail areas where a larger eraser might cause unintended collateral damage.
Xyron Adhesive Eraser: Best for Large Cleanup
The Xyron eraser is designed with a broad surface area that makes quick work of clearing away adhesive trails left by heavy-duty tape runners. When working with larger projects, such as mounting multiple test swatches on a mounting board, this eraser covers ground efficiently.
The material is firm yet pliable, allowing it to pick up dried adhesive without leaving behind oily residues. It functions best on flat, smooth surfaces, preventing the uneven pressure that often leads to surface tearing.
This is the workhorse of the studio for those who handle high-volume mounting tasks. For speed and coverage, the ergonomic shape serves the crafter well during long sessions of studio preparation.
Grafix Rubber Cement Pick-Up: The Crafter’s Go-To
This tool is a classic for a reason, utilizing the natural tack of the rubber to lift dried adhesive right off the project surface. It works by balling up the glue into small, manageable pieces that can be easily brushed away.
It is particularly effective on porous materials, such as heavy-weight cardstock or cotton labels, because it pulls the glue from the surface rather than grinding it down. Think of it like using a lint roller on a dark wool coat; it lifts the debris without disturbing the underlying texture.
Because it is a non-abrasive material, there is very little risk of damaging the fibers or paper grain. Keep this on the craft table for general-purpose cleanup when the project requires a gentle, non-destructive approach.
C-Thru Adhesive Remover: The Best Value Option
The C-Thru adhesive remover offers a straightforward, no-frills solution for those who consume supplies rapidly. Its composition is consistent with standard rubber eraser blocks, providing a reliable performance across a variety of adhesive types.
While it lacks the specific specialty design of more expensive options, its value lies in its longevity. It performs adequately on most craft-grade adhesives and is an excellent starter tool for those just beginning to organize a dedicated workspace.
Consider this the “staple” item in the toolkit. It may not tackle complex, heavy-duty industrial glues, but for everyday adhesive mishaps, it provides a cost-effective solution that balances price with performance.
Elmer’s Craft Bond: The Most Trusted Brand Name
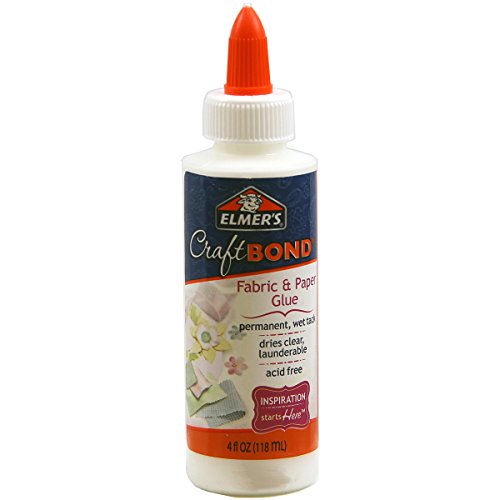
Elmer’s Craft Bond is widely recognized, and its performance reflects years of focus on the crafting market. The block is sized comfortably for the hand, making it easy to exert controlled pressure when working on intricate mounting tasks.
The rubber density is intentionally balanced to be firm enough to grab sticky residues but soft enough to prevent marring surfaces. It behaves predictably, which is exactly what a maker needs when the stakes—such as a final mounting of a commissioned fiber art piece—are high.
If reliability and widespread availability are the top priorities, look no further than this option. It remains a consistent performer that rarely disappoints regardless of the project’s complexity.
Natural Crepe Rubber Block: The Bulk Buy Pick
The crepe rubber block is the industrial-grade version of the standard glue eraser. Its unique, open-cell structure makes it incredibly effective at grabbing and pulling large quantities of dried glue off a surface with minimal effort.
This is the tool for those who maintain a busy studio or handle large-scale collage and mounting projects. Because it is porous, it holds onto the lifted adhesive better than denser, solid erasers, which helps keep the workspace tidy.
The tradeoff is its size; it is often bulky, making it less ideal for small, tight corners. However, for sheer cleaning power, nothing else matches the effectiveness of natural crepe rubber on stubborn, wide-area adhesive spills.
How to Choose the Right Glue Eraser for You
The primary factor in choosing an eraser is the sensitivity of the material you are cleaning. For delicate surfaces or tight, intricate areas, always opt for a softer or more precise tool, such as the Tombow Sand Eraser.
Consider the volume of work and the type of adhesive involved in your projects. If you are regularly removing heavy-duty tape residue from large surfaces, a high-density crepe rubber block will save significant time and wrist strain.
If your projects involve a mix of paper, fabric, and stiffened fiber materials, keep two erasers on hand: one for high-precision, fine-grit work and one for bulk cleaning. This keeps the precision tool clean and ensures the bulk eraser doesn’t accidentally snag delicate fibers.
Pro Tips for Using Your Glue Eraser Correctly
Always test the eraser on a scrap piece of the same material before applying it to the final project. This ensures that the friction won’t cause unintended pilling or discoloration, much like testing a new steam setting on a delicate silk-blend yarn.
Use short, consistent strokes rather than long, dragging motions. Long motions can stretch materials, especially if you are working with woven labels or thin paper.
If the eraser becomes saturated with glue, simply rub it against a piece of clean, textured sandpaper or a dry paper towel to refresh the surface. This maintains the “grip” and keeps the tool working at peak efficiency.
What Adhesives Do Glue Erasers Work Best On?
Glue erasers are most effective on pressure-sensitive adhesives, such as those found on double-sided tapes or glue runners. They also perform well on dried rubber cement, which is designed to lift away from surfaces easily.
They are generally less effective on liquid glues that have soaked deep into the fibers of a fabric or porous paper. In those cases, the glue has created a permanent bond with the material itself, making physical removal impossible without damage.
When in doubt, think of these tools as “surface-level cleaners.” They lift what sits on top of your project but cannot undo chemical bonding that has already occurred within the substrate.
Cleaning and Caring for Your Adhesive Eraser
Maintaining your eraser is just as important as maintaining your knitting needles or sewing shears. Over time, the surface of the eraser will collect dirt, dust, and tiny adhesive bits, which reduces its effectiveness.
Keep your erasers in a designated container away from direct heat or sunlight. Excessive heat can alter the chemical properties of the rubber, making it brittle or overly tacky, which could cause it to leave more residue on your projects instead of removing it.
When the tool stops “grabbing” the glue effectively, it is time to either clean it thoroughly or replace it. Much like worn-out needles that can snag delicate lace work, a degraded eraser is more of a liability than an asset in the studio.
A well-chosen glue eraser is an essential companion for any crafter who values a polished, professional finish on their creative projects. By understanding the nuances between abrasive options for precision and rubber options for bulk work, you can ensure your hard-earned work remains pristine. Investing in the right tools now will save countless hours of frustration and safeguard the longevity of your finished pieces.