
6 Best Button Shank Molds For Custom Covers To Try
Discover the top 6 button shank molds for custom covers. This guide explores the best tools to achieve professional, durable results for your sewing projects.
Nothing elevates a hand-knitted cardigan quite like a set of custom-covered buttons that perfectly match your yarn choice. While store-bought buttons are functional, creating your own allows you to integrate the exact weight and texture of your project into the final detail. Navigating the world of button molds can be overwhelming, but selecting the right tool ensures a professional, secure finish. Here are the top six options to help you achieve that bespoke, heirloom-quality look.
Dritz Heavy Duty Fabric Covered Button Kits


Dritz is a staple in most sewing notions aisles for a reason, specifically for their consistency and accessibility. These kits are excellent for heavier fabrics like wool tweed or thick linen, which often complement a hand-knit garment.
The "heavy duty" designation refers to the reinforced aluminum construction, which resists bending under the pressure of a button press. If you are working with a dense, non-superwash wool, you need a mold that won’t warp when you pull the fabric taut.
However, the plastic pusher tool included in these kits can be a weak point. If you use too much force, it may snap, so take your time during the assembly process to ensure the fabric is evenly distributed.
Prym Self-Cover Button Molds for Knitwear

Prym molds are often the gold standard for those of us who prioritize a smooth, rounded finish. Their design is particularly forgiving when working with delicate fibers like silk or fine-gauge alpaca blends.
Because these molds are engineered with a slightly deeper cavity, they handle bulkier fabric edges better than thinner alternatives. This is a lifesaver when you are trying to hide the "tail" of a fabric circle without creating a lumpy, uneven button face.
One trade-off is that they can be slightly harder to find in local shops compared to mass-market brands. If you are planning a large project with many buttons, order extra sets upfront to ensure all your buttons have the same structural tension.
Clover Fabric Covered Button Tool Sets

Clover is renowned for ergonomic design, and their button mold sets are no exception. The included rubber mat and precision pusher tool make the assembly process feel less like a chore and more like a craft.
These are perfect for beginners who may struggle with the hand-strength required to snap the button back into the shell. The clear, intuitive markings on the tool help you center your fabric, which is critical if you are using a patterned fabric or a specific yarn-dyed weave.
Be aware that these are generally sized for standard fabric weights. If you are trying to cover a button with a thick, felted wool scrap, you may find the mold capacity a bit tight.
Blumenthal Lansing Button Cover Molds

Blumenthal Lansing offers a straightforward, no-nonsense approach to button covering. These kits are widely available and perform reliably for everyday cardigan or vest projects.
The metal shells are sturdy and provide a satisfying "click" when they lock into place, which gives you confidence that the button won’t pop open mid-wear. They are an excellent choice if you are on a budget but still want a custom look.
The downside is that the finish can sometimes be slightly less polished than high-end European molds. If you are aiming for a competition-level finish, you might need to spend extra time trimming your fabric edges to prevent fraying inside the shell.
Singer Professional Button Covering Kits

Singer kits are designed for longevity, making them a great investment for a knitter who produces sweaters year-round. These molds are built to withstand repeated use, which is essential if you are making a full set of ten or more buttons.
The instructions provided are generally very clear, which helps avoid the common mistake of cutting your fabric circle too small. Always remember: it is better to have a little extra fabric to tuck in than not enough to cover the edges.
These kits work best with medium-weight cottons or blends. If you are using a very slick synthetic fabric, you may need a tiny dab of fabric glue to keep the edges from slipping out of the mold before you seal it.
Hillman Group Self-Cover Button Molds
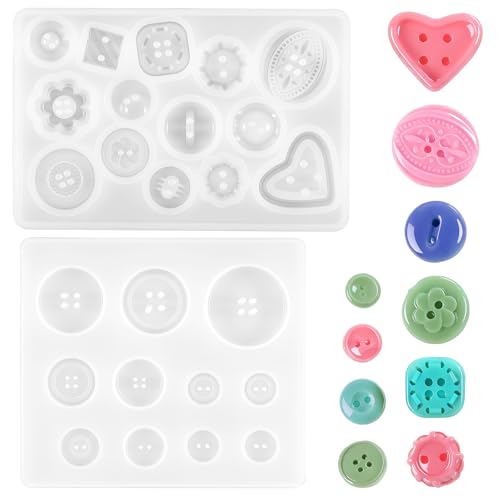
Hillman Group molds are often found in hardware stores, which might seem strange, but they are surprisingly robust. These are "industrial" in the best way possible, offering a very secure grip.
If you are looking to cover buttons with heavy-duty denim or canvas to create a contrast against soft, lofty mohair, these are your best bet. They provide a structural integrity that prevents the button from collapsing under the weight of a heavy garment.
They are less focused on "delicate" aesthetics and more on utility. If your project is a rugged, outdoor-style sweater, these provide the perfect utilitarian match.
Essential Tools for Covering Your Own Buttons
Beyond the molds themselves, a few extra tools will save you from frustration. A sharp pair of embroidery scissors is non-negotiable for trimming fabric circles accurately without fraying.
You should also keep a small plastic stylus or a blunt tapestry needle on hand. These are indispensable for tucking the raw edges of your fabric into the mold cavity before pressing the back plate on.
Finally, consider a small container of fabric fray-stop liquid. Applying a tiny amount to the edges of your fabric circle before assembly prevents hidden threads from working their way out over time.
Choosing the Right Fabric for Button Molds
Not all fabrics are created equal when it comes to button covering. You want a fabric that has enough "give" to stretch over the dome but enough stability to hold its shape.
- Cotton Quilting Weight: The gold standard for beginners; it doesn’t fray easily and holds a crease well.
- Silk/Rayon: Beautiful but slippery; use a light interfacing on the back to provide structure.
- Lightweight Wool: Excellent for matching your project; ensure it is not too thick or the back won’t snap in.
Avoid fabrics with high stretch or spandex content, as they will distort the shape of the button. Stick to natural fibers whenever possible for the best results.
Tips for Securing Buttons to Knitted Garments
The biggest mistake knitters make is sewing a covered button directly onto the fabric without reinforcement. Because hand-knitted fabric is stretchy, the weight of the button will eventually create a hole.
Always sew a small, flat "stay button" on the inside of the garment directly behind the covered button. This distributes the tension across a wider area of the knitting rather than pulling on a single stitch.
Use a strong, non-stretchy thread like a polyester-wrapped cotton for the actual attachment. A double strand of matching yarn can work, but it often lacks the tensile strength to keep the button from sagging over time.
Troubleshooting Common Fabric Button Problems
If your button back keeps popping off, your fabric circle is likely too thick. Try trimming the edges of your fabric closer to the edge of the button shell before pressing.
If the fabric is bunching on the front, you are likely using too much fabric or not centering it properly. Take the time to create a perfect circle—using a template or a glass—to ensure equal distribution around the perimeter.
If the button feels "loose" or rattles, the shell might be slightly too large for the back plate. A tiny piece of thin batting or an extra layer of fabric inside the shell can act as a shim to hold everything firmly in place.
Creating your own buttons is one of the most rewarding ways to add a professional touch to your hand-knitted work. By choosing the right mold and paying attention to the tension and fabric weight, you ensure your project looks as good on the inside as it does on the out. Don’t be afraid to experiment with scraps from your stash to find the perfect match. With these tools and techniques, your next cardigan will truly be a one-of-a-kind masterpiece.