
6 Best Rivet Anvils For Secure Hardware Placement
Ensure your hardware stays secure with our expert guide to the 6 best rivet anvils. Compare top-rated models and choose the right tool for your project today.
Adding professional hardware to a hand-knitted bag or a leather-cuffed shawl elevates a project from a homemade craft to a finished accessory. Riveting requires specific tools to ensure the metal hardware sits flush, stays secure, and doesn’t damage the underlying fabric. Selecting the right anvil is as foundational to hardware placement as choosing the correct needle size for a specific yarn weight. Use this guide to determine which surface best supports the long-term durability of your fiber art accessories.
Tandy Leather Mini Anvil: Best for Beginners


The Tandy Leather Mini Anvil provides a stable, compact surface perfect for those just starting to add hardware to their fiber projects. Its small footprint ensures it fits easily into a notions bag, much like a set of interchangeable needles.
Because it is solid and heavy for its size, it absorbs the energy of each hammer strike effectively. This stability prevents the rivet from shifting during the setting process, which is vital when working with delicate materials like wool felt or structured canvas.
It lacks the complex features of professional-grade equipment, but simplicity is an asset for a beginner. If a project only requires occasional hardware placement, this anvil offers the essential foundation without the clutter of unused attachments.
Dritz Rivet Tools: Best All-in-One Starter Kit
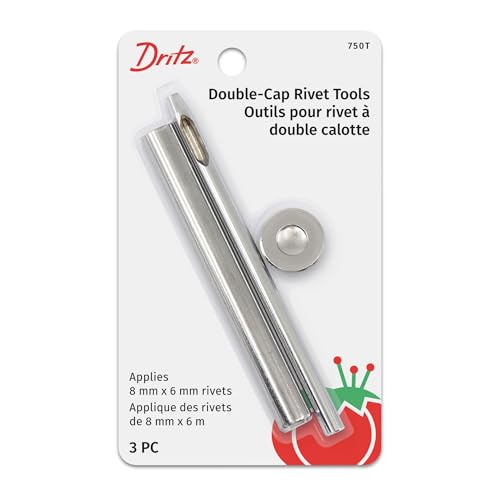
Dritz rivet tools often arrive as part of a kit that includes the anvil base and a corresponding setting tool. This eliminates the guesswork of matching a tool to a specific rivet diameter, similar to how a pre-packaged circular needle set ensures all parts work in harmony.
These kits are ideal for crafters who want to jump straight into a project without sourcing individual components. The setting tools are designed specifically for the rivets provided, ensuring a proper crimp that won’t snag the delicate fibers of a knitted project.
While convenient, these tools are generally intended for lighter-duty applications. Do not attempt to use them for heavy-duty industrial rivets, as the specialized setting tools can deform under extreme pressure.
We R Memory Keepers Crop-A-Dile: Most Versatile

The Crop-A-Dile is a game-changer for makers who oscillate between leather, paper, and heavy fabrics. It functions as both a hole punch and a rivet setter, acting as an all-in-one system that saves significant workspace.
Its reach is particularly impressive, allowing for rivet placement deep within a project where standard anvils simply cannot fit. This is the equivalent of having an extended cable for a circular needle when knitting a large, seamless garment in the round.
The trade-off for this versatility is its manual force requirement. It requires a firm grip, so those with limited hand strength might find sustained, high-volume production sessions tiring.
C.S. Osborne Anvil: The Professional’s Choice
When a project demands industrial-strength hardware, the C.S. Osborne anvil stands as the industry standard. These are heavy, cast-iron workhorses designed to last a lifetime, similar to high-quality bamboo or nickel-plated needles that survive years of consistent use.
The material density provides a superior rebound, ensuring that the rivet expands perfectly inside the cap. This precision is essential when attaching leather straps to a finished sweater or bag where any misalignment could result in a ruined material.
These anvils are an investment in the longevity of a craft studio. They are best reserved for makers who intend to produce finished goods with professional-grade longevity and aesthetic polish.
Kam Snaps Press: Best for High-Volume Crafters
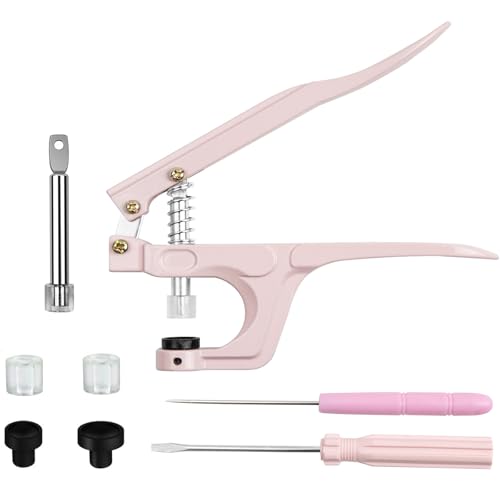
For those who mass-produce items like cloth diapers or large batches of handbags, a manual press is the only logical solution. These machines use a lever mechanism to apply consistent, even pressure that a hammer can never truly replicate.
The consistency of a press means every rivet is set with identical force. This creates a uniform look across an entire collection, mirroring the professional finish expected from a high-end yarn-dyed sweater or a carefully blocked lace project.
While the upfront cost is higher, the time saved is substantial. Consider this an upgrade similar to moving from hand-winding yarn to using a high-quality ball winder and swift.
General Tools Reversible Anvil: Budget Pick
The General Tools Reversible Anvil provides multiple depressions on a single block, catering to various rivet sizes without requiring separate pieces. It is a highly practical choice for the budget-conscious knitter who needs basic functionality for a wide array of project types.
The versatility of multiple concave settings allows for flexibility when switching between small decorative rivets and larger functional fasteners. It behaves much like a set of double-pointed needles, where one toolset can tackle a variety of circumference sizes.
Be aware that these anvils are generally lighter than professional versions. Placing a piece of scrap leather underneath the anvil while in use can help minimize movement and dampen noise.
Choosing the Right Anvil for Your Project Type
Selecting an anvil requires evaluating the thickness and density of your base material. If you are attaching hardware to thick vegetable-tanned leather, you need a heavy, stable anvil that can withstand a forceful strike.
For softer, knitted, or crocheted fabrics, prioritize an anvil that supports the rivet without causing the fabric to bunch. Always reinforce the fabric interface with a small piece of interfacing or scrap leather before riveting.
- Thin Fabrics: Use a smaller, flatter anvil surface.
- Heavy Leathers: Use a high-density, cast-iron anvil.
- Mixed Media: Opt for a reversible anvil with multiple depressions.
Domed vs. Flat Anvils: What’s the Difference?
A domed anvil is designed to cradle the rounded cap of a rivet during the setting process. It prevents the cap from flattening or losing its aesthetic shape when the stem is hammered.
A flat anvil is better suited for decorative hardware with a flat profile or for setting the base of a post. Using the wrong surface can lead to “marring,” where the hardware becomes scuffed or the finish is stripped off during the strike.
Always match the anvil profile to the rivet shape. If you use a flat anvil on a domed rivet, the pressure will be concentrated on the center of the cap, often leading to dents or surface cracking.
How to Prevent Scratches on Your Rivet Caps
The metal-on-metal impact of a hammer and rivet is the leading cause of surface scratches. To protect the aesthetic quality of your hardware, place a small piece of scrap leather or heavy fabric between the rivet cap and the anvil.
This simple barrier acts as a buffer, absorbing the shock while keeping the finish pristine. Much like using a soft tape measure to avoid snagging yarn, this small step ensures your finished accessory remains flawless.
Ensure your setting tool is also clean and free of debris. Any grit trapped in the tool head will be pressed into the rivet during the final strike.
Do You Really Need an Anvil? Alternative Tools
In a pinch, a smooth, heavy-duty concrete floor or a solid steel bench block can substitute for a specialized anvil. These provide the necessary inertia to ensure the rivet expands properly inside the cap.
However, using non-specialized surfaces increases the risk of damage to the rivet finish. If you plan on producing more than one or two projects, investing in a dedicated anvil is worth the cost.
Avoid using wood or soft plastic surfaces, as they will absorb the energy of the hammer strike, resulting in a weak, loose rivet that may fail after minimal use. Proper hardware placement is a mechanical process; the right surface is not a luxury, but a requirement for security.
Selecting the right anvil is as essential as selecting the right gauge for your yarn, ensuring that the hardware remains secure and the fabric remains undamaged for years to come. By matching your tool to your specific project needs and treating your materials with care, you can ensure a professional finish on every accessory. Consistency in tools leads to consistency in the quality of your finished hand-crafted goods.
