6 Best Cable Labels For Complex Studio Setups To Use
Tame your messy wiring with our expert guide to the 6 best cable labels for complex studio setups. Shop our top picks and organize your workflow today.
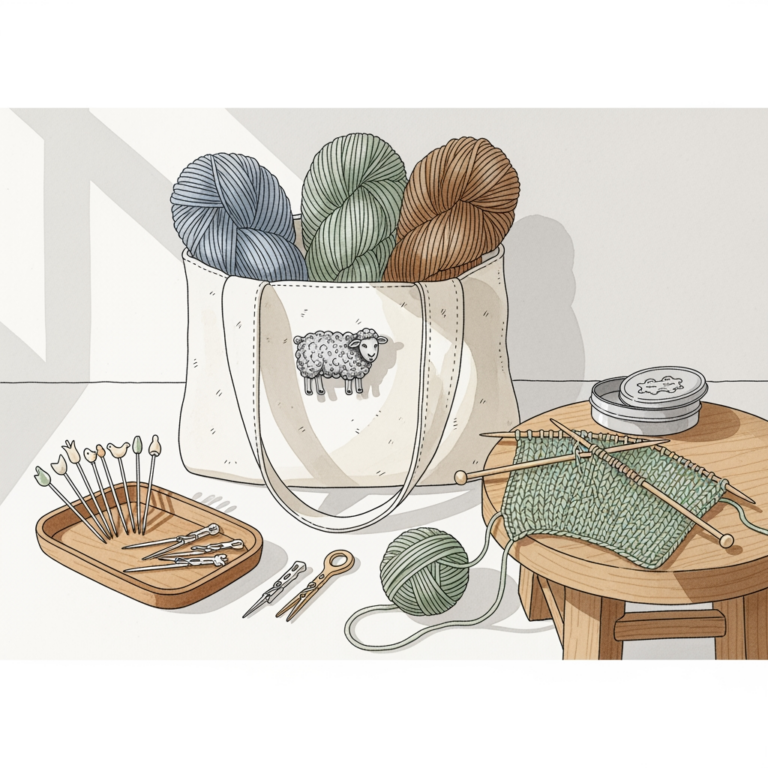
Managing a complex studio setup feels much like wrangling a stash of fine-gauge lace yarns or keeping intricate colorwork floats from tangling. Just as a disorganized workspace ruins the flow of a delicate project, cluttered cables lead to hours of unnecessary troubleshooting. These labeling systems offer the structure needed to keep high-end equipment running as smoothly as a perfectly tensioned knitting machine. Investing in organization now saves the frustration of tracing a mystery cord during a creative breakthrough.
Brother P-touch: Best for Custom Printed Labels
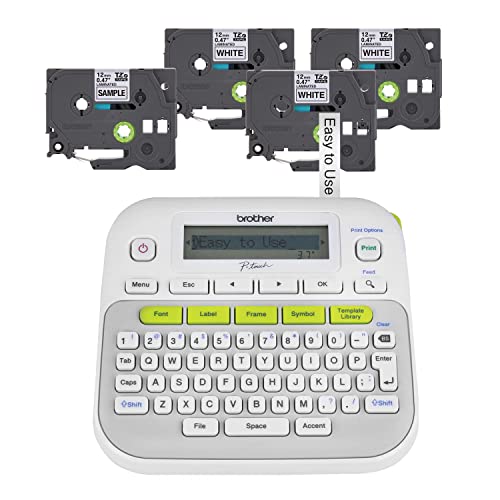
The Brother P-touch system functions like a reliable set of interchangeable needles, offering versatility for nearly any identification task. These thermal printers allow for precise font sizing and layout adjustments, ensuring that even the most cramped labels remain legible.
When labeling power adapters or specialized equipment, the ability to print custom text creates a professional finish that simplifies equipment maintenance. It functions similarly to tracking dye lots; once a system is in place, the consistency makes future identification effortless.
While excellent for clarity, these labels sometimes struggle with the extreme curvature of thin, flexible cables. If the adhesive isn’t applied to a clean surface, the label may peel over time, much like a poorly anchored stitch slipping off a needle point.
DYMO LabelManager: Top Choice for Durability

DYMO LabelManager units are the industrial workhorses of the labeling world, built to withstand the rigors of a high-traffic studio. The resulting output is often thicker and more rigid than standard tape, providing a level of resilience that keeps labels intact through constant movement.
This durability is essential for cords that are frequently unplugged or shifted, such as modular connections or mobile interface units. Think of this as using a sturdy, high-twist wool for a pair of socks—the material is designed to endure friction and repeated handling without fraying or fading.
The trade-off is a slightly bulkier footprint on the cable itself. For extremely tight spaces, the rigid nature of the label tape might prove cumbersome compared to thinner alternatives.
Self-Laminating Wraps: Best for Pro Setups
Self-laminating wraps feature a clear tail that folds over the printed area, shielding the text from oils, dust, and physical wear. This construction mirrors the protective qualities of a well-blocked garment, ensuring that the work remains pristine long after completion.
These wraps are ideal for high-end studio environments where cables must be clearly marked for years without degradation. Once the clear layer is sealed, the label becomes essentially waterproof and resistant to scuffing.
Applying these requires a steady hand and a clean surface, much like grafting a kitchener stitch without dropping a loop. The precision of the application determines the longevity of the label, making it a favorite for those who prioritize long-term reliability over speed.
Velcro Reusable Ties: Best for Frequent Changes
Velcro ties serve as the modular knitting needles of the cable management world, allowing for constant reconfiguration. They provide the ability to bundle cables neatly while leaving room to adjust the setup whenever new equipment is added to the signal chain.
Unlike permanent zip ties, which require a snip and a replacement, these can be undone and reused in seconds. This flexibility is perfect for makers who frequently swap between different hardware configurations or experiment with new routing paths.
Avoid overtightening these ties, as excessive pressure can distort the insulation of delicate signal cables. Much like managing tension when carrying yarn across the back of a sweater, a gentle touch keeps everything secure without compromising the integrity of the underlying fibers.
Snap-On Markers: Easiest for At-a-Glance ID
Snap-on markers function like stitch markers, providing an instant visual cue without requiring adhesive or complex application. These clips wrap around the cable and lock into place, making them perfectly suited for color-coding different signal types.
Because they do not use glue, they never leave a sticky residue behind when removed. This is a significant advantage for those who rent equipment or dislike the look of tape on high-quality studio gear.
These are best suited for thicker, rigid cables rather than thin, delicate ones. If the marker is too large for the diameter of the wire, it will slide around and fail to provide the intended organization.
Avery Printable Tags: Best Budget DIY Option

Avery printable tags allow for mass-labeling using standard office printers, making them the most cost-effective solution for a large studio overhaul. These tags hang off the cable like a fiber sample attached to a finished skein, providing ample space for detailed notes or serialized tracking numbers.
This method works particularly well for identifying the back of a patch bay or the end of a long loom run where space is less restricted. It allows for the use of icons, multiple text lines, and even barcodes for a truly structured inventory.
The primary drawback is that these tags can become snagged if cables are pulled through tight racks or small apertures. They are best reserved for stationary equipment rather than mobile setups that endure constant packing and unpacking.
How to Choose the Right Cable Labeling System
Selection should always be dictated by the frequency of movement in the studio. If the setup is permanent, prioritize durability and low-profile adhesives. If the workflow changes weekly, lean toward modular systems like Velcro or snap-on markers that allow for rapid changes.
Consider the environment as well, noting that heat from equipment and ambient humidity can affect adhesives. Just as high-humidity environments might cause certain fibers to bloom or stretch, extreme studio heat can cause poor-quality label adhesives to slip.
Always test one label on a spare piece of cable before committing to a full labeling project. Verifying that the adhesive bonds well to the specific jacket material saves time and ensures the setup will last.
Creating a Labeling Scheme That Actually Works
A logical labeling scheme is the roadmap for a productive studio, similar to a pattern draft that guides every step of a complex lace project. Start by assigning colors to signal types—such as yellow for power, blue for audio, and red for data—to create a visual rhythm that the brain can decode instantly.
Use clear, consistent abbreviations on all labels to maintain uniformity across the entire rack. Avoid overly complex codes that require a legend to decipher; the most efficient system is one that remains readable even when under stress.
Update the labeling scheme whenever the studio configuration changes significantly. A label that points to a non-existent port is as useless as a pattern with a missing row instruction.
Labeling Tips for Crowded Racks and Desks
In tight, crowded spaces, place labels at both ends of every cable to simplify tracing from the source to the destination. It is the cable management equivalent of checking both ends of a circular needle set to ensure the cable hasn’t twisted before joining in the round.
For narrow desk setups, use “flag” style labels that extend outward from the cable. This allows the label to be read without having to rotate the cable or crawl behind a desk, keeping the focus entirely on the creative process.
Bundle cables together with Velcro ties periodically, but leave enough slack for each individual cord to be removed or moved. Over-tensioning cables can lead to internal damage, just as overtightened stitches can distort the drape of a finished garment.
Label Durability: Vinyl vs. Paper vs. Nylon
Vinyl labels provide superior resistance to moisture and are generally the most flexible for wrapping around small-diameter wires. Paper labels, while inexpensive, lack the structural integrity required for high-traffic environments and will inevitably tear or smudge over time.
Nylon labels sit in a middle ground, offering a degree of strength and heat resistance that makes them suitable for heavy-duty industrial cables. Think of this as the difference between using cotton, which is sturdy but non-elastic, and a synthetic-wool blend that offers a balance of durability and flexibility.
Choose the material based on the expected “wear and tear” of the specific cable run. A cable that lives behind a desk doesn’t require the same robust, weather-resistant materials as a cable that travels frequently in a gig bag.
Effective cable management is not merely about aesthetics; it is about maintaining a professional workflow that allows for seamless creative expression. When every cord has its place and every connection is clearly marked, the technical barriers to making music or art simply vanish. Choose the system that fits the current needs of the studio, knowing that as projects grow in complexity, the methods of organization can evolve right alongside them. A well-organized studio is the foundation for every great session.