6 Best Fabric Adhesives For Diy Lampshade Making
Discover the 6 best fabric adhesives for DIY lampshade making to ensure a professional, long-lasting finish. Read our expert guide and start your project today.
Transforming a tired lampshade with leftover yarn-dyed linen or a cherished swatch of hand-knitted lace requires more than just careful placement. Much like selecting the correct needle size to achieve the perfect gauge for a delicate mohair project, choosing the right adhesive determines the structural integrity and aesthetic finish of the piece. An ill-fitted adhesive can bleed through natural fibers, leave unsightly residues, or fail under the heat of a lightbulb. This guide navigates the essential bonding agents to ensure your textile-to-shade projects remain as polished as a perfectly grafted kitchener stitch.
3M Super 77 Spray: For Large Fabric Panels

When covering a large-scale drum shade with a heavy wool blend or a structured cotton, even tension is the primary concern. 3M Super 77 offers a wide, even mist that prevents the “pooling” effect often seen with liquid glues, which can cause bubbles or uneven textures.
This spray is ideal for bonding fabric directly to the plastic styrene liner of a lampshade. Just as one must block a finished sweater to ensure symmetry, a spray adhesive allows for a smooth, repositionable start before the final bond sets permanently.
Be mindful of the overspray. Protect your workspace thoroughly, as the tackiness is aggressive and can migrate to knitting needles or delicate yarn stashes nearby. If working with lightweight silks or thin rayons, opt for a light dusting rather than a heavy coat to avoid soak-through.
Beacon Fabri-Tac: Best For Trims and Seams

Precision is the hallmark of a skilled fiber artist, and Beacon Fabri-Tac provides the control needed for delicate finishing touches. This permanent liquid glue is unmatched for attaching decorative gimp, velvet ribbons, or hand-knitted edgings to the top and bottom rims of a shade.
It dries clear and remains flexible, meaning it won’t crack or flake when the lampshade expands slightly due to bulb heat. Think of it as the adhesive equivalent of a sturdy mattress stitch; it holds firmly without creating a rigid, brittle line that might pull away from the fabric.
Apply this with a fine-tipped applicator or a toothpick for the cleanest results. It acts quickly, so ensure the trim is properly measured and pinned before application to avoid the frustration of a crooked seam.
Aleene’s Fabric Fusion: For A Softer Fabric Feel

Some adhesives leave fabric feeling stiff, like starched lace, which can look unnatural on a lampshade. Aleene’s Fabric Fusion is water-based and maintains the supple hand of the textile, making it the superior choice for thin, delicate fabrics like silk or fine cotton gauze.
This glue is particularly effective for those who appreciate the drape of natural fibers. It creates a strong bond that survives the light-induced heat cycles without hardening or becoming brittle.
Unlike contact cements that demand an instant, permanent connection, this formula offers a brief window for minor adjustments. Use it when bonding overlapping seams where flexibility is essential for a clean, rounded silhouette.
Mod Podge Matte: Perfect for Decoupage Shades
Mod Podge is a classic for a reason, specifically when the project involves applying scraps of printed fabric or lace motifs directly onto a hard-backed shade. Its dual-purpose nature allows it to act as both the adhesive and the protective sealant in one go.
Because it is water-based, it allows for a bit of working time to smooth out air bubbles with a brayer or a credit card. It is perfect for those who want to “paint” their fabric onto the structure, ensuring a tight seal that prevents fraying edges.
Avoid using it on very thin, light-colored fabrics, as it can occasionally cause slight darkening or water marks upon initial application. Always test a scrap piece first to ensure the finish remains matte and clear once dry.
Weldbond Adhesive: The Non-Toxic, Heat-Safe Pick
Safety and heat resistance are non-negotiable when dealing with fixtures that stay on for hours. Weldbond is a highly versatile, non-toxic choice that sets with incredible strength and has a high heat threshold, making it a reliable partner for lampshade construction.
It dries completely clear and is excellent for bonding fabric to metal frames or plastic linings. For those sensitive to the chemical fumes of aerosol sprays, this is a breath of fresh air that provides a professional-grade hold without the harsh odor.
Consider it the “workhorse” of the studio; it is less prone to heat-induced yellowing than many rubber-based glues. If the lampshade is intended for a bedside table where it will be handled frequently, the durability of this bond is highly beneficial.
HeatnBond UltraHold: The No-Glue, Iron-On Option
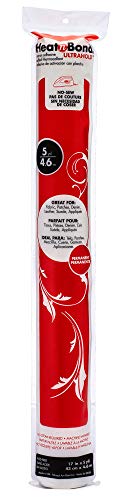
For those who prefer the cleanliness of a dry application, iron-on adhesive webbing is the ultimate tool. It provides a crisp, professional edge that looks as clean as a machine-hemmed garment, eliminating the risk of sticky fingers and glue smears.
Simply fuse the webbing to the back of your fabric with an iron, peel away the paper backing, and iron the fabric onto the lampshade frame. This ensures an perfectly uniform bond across the entire surface area, free of the ripples that can occur with liquid or spray glues.
It is particularly useful for synthetic fabrics that might be prone to puckering. Ensure the temperature of the iron is calibrated to the fabric’s requirements; using an iron that is too hot can scorch the textile, just as it would ruin a fine wool blend if left too long on one spot.
Spray vs. Liquid Glue: Which Is Right for You?
Choosing between spray and liquid glue comes down to the surface area and the fabric type. Sprays are designed for large, flat panels where you need to maintain a thin, consistent layer to prevent texture show-through.
Liquid glues are meant for detail work, seams, and structural reinforcements. If you are applying a delicate crochet trim, reach for the liquid bottle; if you are wrapping an entire drum shade in heavy linen, go with the spray.
Remember that sprays are faster but unforgiving, while liquids are precise but require a steadier hand. Assess the complexity of your shade’s geometry before deciding on your method.
Key Safety Tips for Using Fabric Adhesives
Working with adhesives requires the same respect for tools as handling sharp steel knitting needles or heavy-duty looms. Always ensure the workspace is well-ventilated, especially when using aerosol sprays, which can linger in the air long after the work is done.
Store your adhesives in a cool, dry place to maintain their chemical integrity. Old, partially dried-out glue can lead to weak spots, much like using a needle that has developed a burr will snag and ruin a delicate mohair fiber.
Wear protective gloves if you have sensitive skin, and always keep a damp cloth nearby to clean up spills immediately. Removing glue before it cures is significantly easier than trying to scrub it off dried fabric.
Preventing Yellowing: Heat Resistance Is a Must
Lampshades endure constant thermal stress, which can cause inferior adhesives to turn yellow or brown over time. Always prioritize products labeled as “heat-resistant” or “acid-free” to ensure the longevity of the project.
Natural fibers like silk are particularly susceptible to discoloration if the adhesive reacts poorly to heat. A light-colored fabric shade, when illuminated, will highlight every flaw in the underlying glue, making the choice of a high-quality, clear-drying adhesive critical.
If you are concerned about the longevity of the shade, avoid rubber-based contact cements, which are notorious for yellowing and losing their grip when subjected to bulb heat. Stick to water-based or archival-grade products for the best long-term results.
Prepping Your Fabric for a Pro-Level Finish
Just as a knitter would never skip a gauge swatch, one should never skip fabric preparation. Ensure your fabric is clean, pressed, and free of sizing agents that might interfere with the adhesive’s ability to bond with the fibers.
If your fabric is prone to fraying, use a light misting of fabric stiffener or a very thin layer of fray-check on the raw edges before assembly. This prevents loose threads from getting caught in the glue and creating a messy, unkempt edge.
Finally, measure twice and cut once. Working with adhesives is a linear process; having your fabric accurately cut and ready to align ensures that the project proceeds smoothly without the need for frantic, messy adjustments.
Selecting the right adhesive is the final, essential step in elevating a handmade lampshade from a craft project to a professional-looking home accessory. By matching the adhesive to the fabric weight and the construction style, you ensure that your work stands the test of time and light. Always keep these tips in mind, and you will find that the technical side of lampshade making is as rewarding as the creative process itself.