6 Best Quality Markers For Fabric Labeling To Try
Struggling with smudged designs? Discover the 6 best quality markers for fabric labeling to ensure crisp, permanent results. Shop our top picks for your projects.
Labeling a handmade garment is the final, essential step in documenting the labor of love that goes into every stitch. Whether tracking fiber content for future washing instructions or adding a maker’s mark to a cherished heirloom, the choice of marking tool directly affects the longevity and legibility of the design. Using the wrong pen can lead to unsightly bleeding or premature fading, which undermines hours of careful craft. Selecting the right fabric marker ensures that the label remains as durable as the yarn itself.
Sharpie Stained: Best for Permanent Results

Sharpie Stained markers are designed specifically to penetrate fabric fibers, creating a bond that holds up exceptionally well through repeated washings. Unlike standard office markers, the ink formulation is thicker and less prone to feathering on absorbent materials like cotton labels or ribbon.
This marker performs best on stable, tightly woven fabrics. For a knitter adding a tag to a wool-blend sweater, the crisp line quality ensures that small characters—like fiber percentage or care symbols—remain readable even after the garment experiences the agitation of a machine cycle.
Because the ink is robust, it can be unforgiving if applied to delicate, sheer ribbons. Always test the marker on a scrap piece of the exact material being used for the label to ensure the ink does not migrate beyond the desired stroke.
Crayola Fabric Markers: Best for Bright Colors

Crayola Fabric Markers offer a vibrant color payoff that serves well for decorative labeling or personalized kids’ gear. While these are often categorized as hobbyist tools, they provide a reliable, non-toxic option for makers who prefer bold, playful aesthetics over technical precision.
The ink flow is relatively heavy, which can lead to larger dot sizes if the marker is pressed firmly into the fabric. To maintain clarity, use a light touch and quick strokes to prevent the pigment from saturating the weave too deeply.
These markers are ideal for lighter-weight cottons or poplin labels where color saturation is the priority. They are not recommended for dark or high-pile fabrics, as the color intensity will struggle to stand out against the backdrop.
Tulip Dual-Tip Markers: Most Versatile Choice
The dual-tip design makes this marker a workhorse for the fiber arts studio, offering both a fine point for lettering and a broad tip for filling in blocks of color. Having two options in one barrel saves precious space in a notions bag or crowded project basket.
For complex labeling tasks—such as writing long-form care instructions on a small strip of twill tape—the fine tip provides the necessary control for legible script. Switch to the broader end when marking the size or year on a swatch, ensuring the information is visible at a glance.
This is a versatile, mid-range choice that balances precision with durability. It is an excellent “all-rounder” for those who maintain a varied inventory of label materials, ranging from synthetic satin to natural canvas.
Dritz Fabric Pen: Ideal for Quilting Labels
Dritz has long served the sewing community, and their fabric pens are engineered specifically for the precision required in garment construction. These pens are remarkably steady, avoiding the skip-and-drag motion common with cheaper felt-tip alternatives.
The ink is formulated for longevity on quilting cottons, which are standard for DIY labels. When pinning a label to a finished shawl or blanket, the Dritz pen ensures that the text does not blur or wash out, even when the item is frequently blocked and laundered.
A key advantage here is the reliability of the line width. For makers who prioritize uniformity across an entire collection of knitted hats or garments, the Dritz pen provides consistent results every single time.
Sakura Pigma Micron: Best for Fine Line Detail
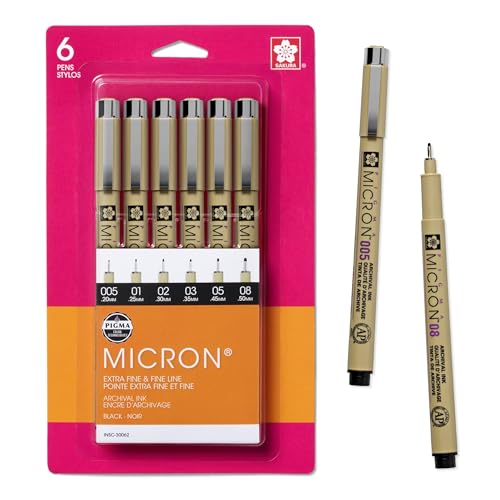
When the goal is to include intricate details—such as complex washing symbols or decorative miniature motifs—the Sakura Pigma Micron is the gold standard. The archival-quality pigment ink is waterproof and fade-resistant, which is essential for items meant to be passed down through generations.
The needle-point tips allow for extreme detail that standard fabric markers cannot achieve. While it requires a very steady hand, it is the best tool for writing on narrow ribbons or small corner tags where space is at a premium.
Note that because the tip is so fine, it can snag on heavily textured fabrics like loose-weave linen. Use these pens on smooth, pressed fabric surfaces to get the best performance out of the delicate nibs.
Pentel Fabric Gel Roller: For Bold, Opaque Art

Gel-based markers offer a unique tactile experience, laying down a layer of opaque, pigment-rich ink that sits slightly on top of the fabric fibers. This makes them stand out beautifully on darker fabrics where traditional dye-based markers might disappear.
The gel ink creates a rich, saturated look, though it does require a longer drying time than felt-tip markers. Patience is the secret to success here; touching the label too soon after marking will inevitably lead to smudging.
This is the preferred choice for artists who want their labels to look like custom-screened prints. It is particularly effective for labeling dark-colored project bags or synthetic yarn storage bins where high-contrast visibility is required.
How to Pick the Right Marker for Your Fabric
Choosing the right marker starts with evaluating the texture and absorbency of the fabric. Tightly woven, smooth materials like cotton poplin or silk ribbons accept fine-line markers best, whereas loose-weave or textured fabrics require a marker with a heavier, more viscous ink to prevent bleeding.
Consider the intended use of the item. If the labeled object is a garment that will be machine-washed regularly, opt for permanent, wash-fast pigment inks. If the label is for a gift-wrapped item or a temporary storage bin, lower-cost, water-based markers will suffice.
- For Fine Detail: Select pens with technical, needle-style tips.
- For Dark Fabric: Choose opaque, pigment-based gel rollers.
- For Everyday Washability: Look for permanent, heat-set dye markers.
Pro Tips to Stop Your Fabric Marker from Bleeding
Bleeding occurs when ink travels along the capillaries of the fabric threads before it has a chance to set. To combat this, always place a piece of scrap cardboard or a dedicated cutting mat underneath the label while marking to prevent ink from soaking through to the underlying layers.
Another effective strategy involves applying a light spray of starch to the label fabric before writing. Starching stiffens the fibers and creates a barrier, forcing the ink to sit on the surface rather than wicking into the weave.
If the fabric is particularly prone to bleeding, test the marker on a scrap piece using a “flicking” motion. By keeping the pen tip moving constantly, you prevent the excess ink buildup that typically leads to feathering.
Heat Setting 101: Making Your Designs Last
Heat setting is the final step in ensuring that ink bonds permanently to synthetic or natural fibers. Once the ink is dry to the touch, place a clean piece of cotton fabric over the label to act as a pressing cloth.
Use a dry iron—never steam—set to the temperature recommended for the fabric type. Press firmly for 30 to 60 seconds, moving the iron slightly to ensure even heat distribution. This step is non-negotiable for any label that will face the rigors of a washing machine.
Skipping this step often leads to the disappointment of a faded label after only a few cycles. Remember that different fibers have different heat tolerances; always err on the side of caution to avoid scorching delicate synthetic ribbons or ribbons with a high polyester content.
Washing Labeled Fabric: Care and Best Practices
When laundering items with labeled components, treat the label with the same care as the garment itself. Use a mild, pH-neutral detergent and turn the garment inside out to reduce mechanical abrasion against the label during the spin cycle.
Avoid using bleach or harsh stain removers directly on the labeled area, as these can break down even the most permanent inks. For longevity, air-drying is always superior to machine drying, as the high heat and friction of a dryer can accelerate the breakdown of ink pigment over time.
Consistent care ensures that the history and fiber content of the piece remain legible for as long as the garment stays in the wardrobe. By combining the right marker with proper heat setting and gentle maintenance, you ensure that every project is labeled with professionalism and pride.
Choosing the correct marker is a minor investment that pays significant dividends in the long-term presentation and utility of handmade work. By balancing the specific needs of the fiber with the right ink technology, any knitter can achieve a professional finish that stands the test of time.