
6 Best Sewing Gauge Tools For Button Placement
Achieve professional results with our top 6 sewing gauges. This guide compares essential tools for precise, symmetrical button placement on every garment.
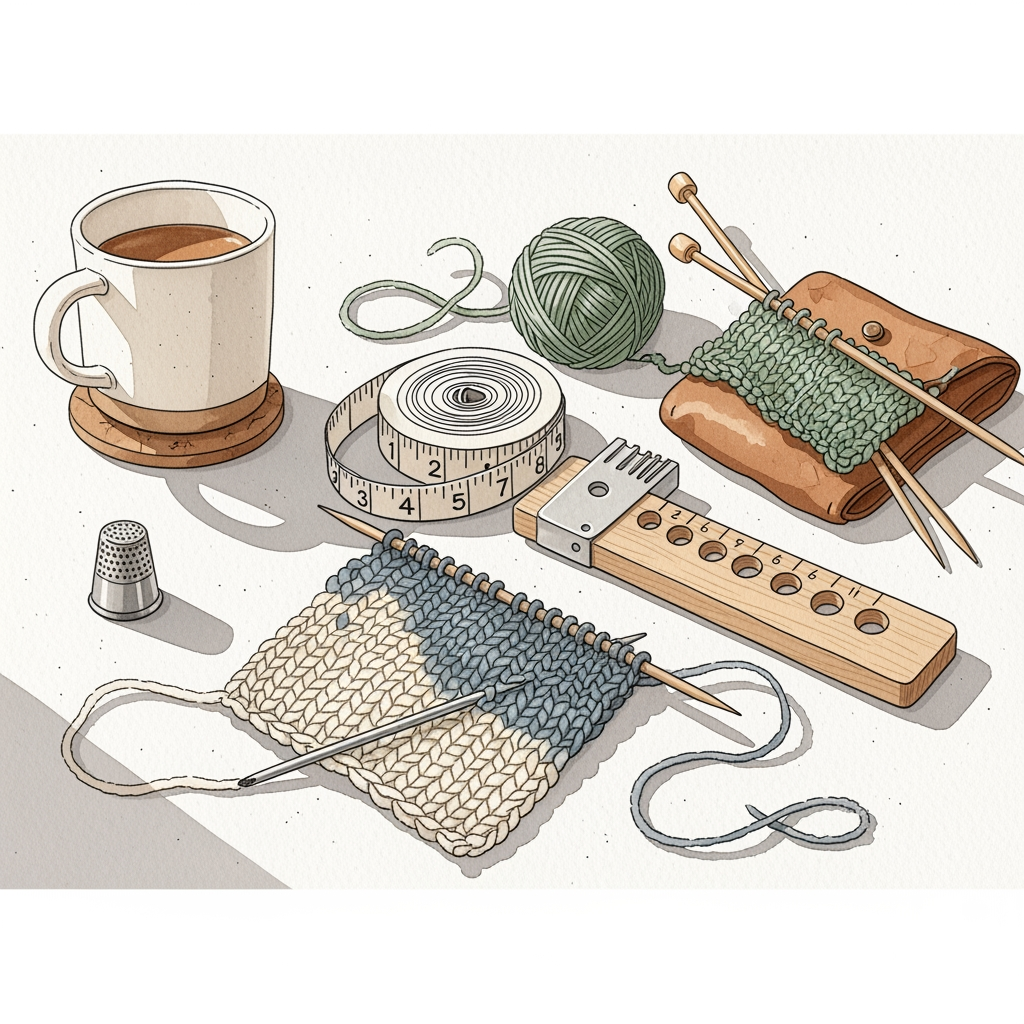
Nothing ruins a beautifully finished cardigan faster than lopsided or unevenly spaced buttons. As someone who has spent decades wrestling with button bands, I know that precision in the final stages is just as vital as your initial tension. These six tools are the industry standards that help take the guesswork out of your button placement. Investing in the right gauge will ensure your hard work looks professional rather than homemade.
Clover 5-in-1 Sliding Gauge for Precision Spacing

This tool is a staple for a reason, acting as a Swiss Army knife for your sewing kit. Its sliding marker allows you to set a specific distance and lock it in, which is a lifesaver when you are repeating the same measurement six or seven times down a front band.
The real magic lies in its versatility. You can use it to measure hem depths, seam allowances, and, most importantly, the exact spacing between your buttonholes. Because it is made of durable plastic, it has a bit of flexibility that feels gentler against delicate hand-knits than a rigid metal ruler.
However, keep in mind that the sliding mechanism can occasionally slip if you’re heavy-handed. Always double-check your setting against a master reference point before marking your fabric. It is the best all-around choice for the knitter who wants one tool to handle multiple finishing tasks.
Dritz Ezy-Hem Gauge for Versatile Button Marking

Don’t let the name fool you into thinking this is only for folding fabric edges. Its unique shape and heat-resistant properties make it an excellent guide for marking button placements directly on a finished garment.
If you are working with a wool blend that requires a quick steam press, this gauge can handle the heat. It allows you to align your buttonholes against the edge of the band with perfect consistency. The curved edge is particularly useful if you are working on a garment with a rounded neckline or a shawl collar.
The tradeoff here is that it is slightly bulkier than a flat ruler. If your button band is very narrow, you might find the width of the gauge a bit intrusive. Use this tool if you frequently work with fusible interfacings or need to press your button bands while you mark them.
Collins Sewing Gauge for Accurate Button Alignment

The Collins gauge is a classic, no-nonsense metal tool that feels substantial in the hand. Its primary strength is its simplicity and the high-contrast markings that are easy to read, even under dim evening lighting.
When you are working with dark-colored yarns, seeing your measurements can be a struggle. The etched lines on this metal gauge don’t rub off over time, ensuring your measurements remain accurate for years. It is thin enough to slide between stitches without distorting the fabric.
Be aware that metal tools can sometimes catch on snag-prone fibers like mohair or silk. Always move the gauge slowly and deliberately across your knitted surface. Choose this if you want a permanent, reliable tool that won’t wear out after a few dozen sweaters.
Singer Sewing Gauge for Measuring Button Intervals
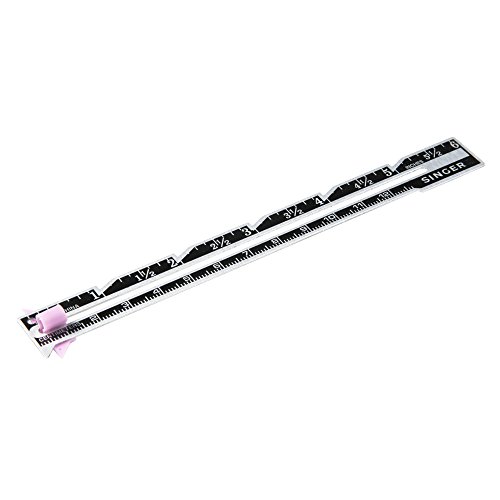
Singer’s version of the sewing gauge is designed for speed and efficiency. It features a simple sliding pointer that stays put, which is ideal when you are working on a long button band for a duster or a long-line coat.
The gauge is lightweight and fits easily into a standard notions pouch. If you are a knitter who travels to workshops or knit-nights, this is an excellent, low-profile addition to your project bag. It is perfectly adequate for standard button sizes and spacing requirements.
The main drawback is that it lacks some of the bells and whistles of more expensive models. If you are doing complex, decorative button placement, you might find it a bit basic. It is the perfect "workhorse" gauge for standard, everyday knitting projects.
Quilter’s Rule 6-Inch Gauge for Perfect Placement
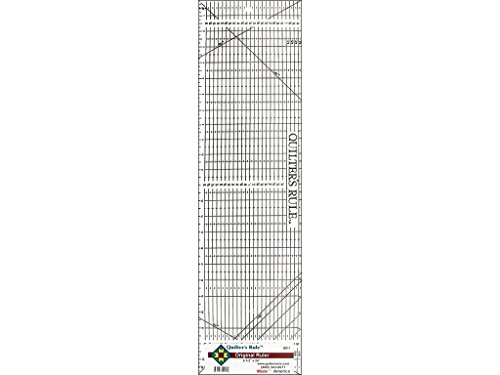
While designed for quilters, this transparent gauge is a hidden gem for knitters. Because it is clear, you can see the stitches underneath the tool, which helps you align your buttonholes with specific rows or columns of stitches.
This is invaluable when you are trying to center a button on a cable or a specific lace repeat. You can literally see your knitting through the ruler, allowing you to account for the natural stretch of the fabric as you mark. It removes the "blind" guessing game that comes with opaque tools.
Since it is made of rigid plastic, it doesn’t bend, which can be a disadvantage on curved edges. You’ll need to be mindful of your fabric’s drape when using it. This is the go-to tool for the knitter who values visual alignment over everything else.
Taylor Seville Quick-Measure Gauge for Fast Work

Taylor Seville is known for ergonomic design, and this gauge is no exception. It features a comfortable grip that makes it easier to hold steady while you mark your yarn with a tailor’s chalk or a removable marker.
The measurement markings are printed with high precision, which is helpful when you are working on fine-gauge garments where a millimeter of error is noticeable. If you struggle with hand fatigue or have limited dexterity, the ergonomic handle will be a welcome change.
The tool is slightly more expensive than basic gauges, but the ease of use justifies the cost for many. It is a specialized tool, so it might be overkill if you only knit one sweater a year. Invest in this if you are a prolific knitter who wants to reduce hand strain during the finishing process.
How to Measure Button Spacing for Your Knitwear
Measuring for buttons isn’t just about dividing the length by the number of buttons. You must account for the "roll" of the fabric and the thickness of the yarn.
- Account for the button diameter: Always add a few millimeters of clearance so the button slides through without stretching the hole.
- Factor in the band tension: Knit fabric stretches differently than woven fabric; measure while the band is laying flat but not pulled taut.
- Test the spacing: Use a scrap piece of yarn or a paper template to visualize the spacing before you commit to marking your final garment.
Remember that buttons placed too far apart will cause the fabric to gap between them. For most DK or worsted weight sweaters, a 3 to 4-inch interval is the sweet spot.
Tips for Marking Button Holes on Hand-Knit Fabric
Marking your knit fabric requires a gentle touch to avoid snagging the yarn. Avoid using heavy pins, which can leave permanent holes or distort the gauge of your stitch pattern.
- Use a washable fabric marker or a small piece of contrasting waste yarn to "tack" the location.
- Always mark on the wrong side of the fabric if possible to keep the right side pristine.
- If you are using chalk, test it on a swatch first to ensure it brushes off completely from your specific fiber.
Never mark your buttons while the garment is on a mannequin or your body. The weight of the garment will stretch the fabric, leading to inaccurate spacing once the item is taken off.
Ensuring Symmetry When Placing Multiple Buttons
Symmetry is the hallmark of a professional finish. If you have a left and right button band, mark them simultaneously if possible, or use a master template.
- Create a cardboard template: Cut a strip of cardstock the length of your button band and punch holes where the buttons should go.
- Align with the hem: Start your measurements from the same point on both sides, usually the bottom edge or the neckline.
- Check the mirror image: Lay your two bands side-by-side to ensure the holes align perfectly before you start sewing.
If you are working with a patterned stitch, try to align your buttons with the same point in the pattern repeat on both sides. This creates a subtle, professional detail that elevates the look of the entire garment.
Essential Tools for Professional Button Finishes
Beyond your gauge, you need a few other items to ensure your buttons stay secure and look intentional. A sharp, fine-tipped tapestry needle is non-negotiable for threading through button shanks.
- Button shank tool: This helps create a small space between the button and the fabric, preventing the button from pulling the knit fabric tight.
- Matching sewing thread: Use a strong, color-matched polyester or silk thread rather than the yarn itself, which can be too thick and prone to snapping.
- Backing buttons: Using a small, flat button on the inside of the garment distributes the stress and prevents the main button from pulling through the knit fabric over time.
Don’t rush the finishing process; it is the final 5% of the project that determines how it will wear for the next decade. Take your time, use your gauges, and your buttons will look like they were placed by a master tailor.
Mastering button placement is a rite of passage for every knitter looking to elevate their craft. By using these specialized gauges, you eliminate the uncertainty that often leads to lopsided bands and stretched buttonholes. Remember that the best tool is the one that fits your hand and your specific project needs. Take these tips to your next project, and enjoy the satisfaction of a perfectly finished garment.
